Home Blog Page 9

How Do You Clean White Laces

0

Guide for Bright, Spotless Laces

White laces add a classic, clean touch to any pair of shoes. However, they can easily become dirty, stained, and discolored, detracting from your overall look. Whether they’re on your favorite sneakers, dress shoes, or boots, keeping white laces clean can be challenging. Fortunately, with the right methods and tools, you can restore your laces to their original brightness.

In this guide, we’ll explore the best techniques for cleaning white laces, the common mistakes to avoid, and tips for maintaining them in pristine condition.

Why Do White Laces Get Dirty So Quickly?

White laces, while stylish, are prone to dirt, grime, and stains. They can pick up dirt from the ground, absorb oils from your hands, and even get stained by the fabric of your shoes. Over time, these factors can lead to discoloration and an overall dingy appearance.

Common Causes of Dirty White Laces

  1. Environmental Exposure: Dust, dirt, and debris from the ground can quickly accumulate on white laces, especially if you wear your shoes outdoors frequently.
  2. Oils and Sweat: The natural oils and sweat from your hands can transfer to the laces, leading to yellowing and stains.
  3. Fabric Dye Transfer: If your shoes have darker fabric, the dye can sometimes bleed onto the laces, causing discoloration.
  4. Spills and Stains: Food, drinks, and other substances can easily stain white laces, making them look unsightly.

How to Clean White Laces: Step-by-Step Instructions

Cleaning white laces may seem like a daunting task, but with the right approach, you can achieve excellent results. Here’s a step-by-step guide on how to clean white laces effectively.

Step 1: Remove the Laces from Your Shoes

Before you begin cleaning, remove the laces from your shoes. This allows you to clean them thoroughly without missing any spots. It also prevents any damage to the laces or shoes during the cleaning process.

Step 2: Pre-Treat Stains

If your white laces have stubborn stains, pre-treating them is crucial. Apply a small amount of stain remover or laundry detergent directly to the stained areas. Gently rub the fabric together to work the product into the stain.

Step 3: Soak the Laces

Fill a bowl or sink with warm water and add a small amount of mild laundry detergent. Submerge the laces in the soapy water and let them soak for 20 to 30 minutes. This helps to loosen dirt and stains from the fabric.

Step 4: Scrub the Laces

After soaking, use a soft brush, such as an old toothbrush, to scrub the laces. Pay special attention to any stained or particularly dirty areas. Be gentle to avoid damaging the fabric, but thorough enough to remove all dirt and grime.

Step 5: Rinse Thoroughly

Rinse the laces under cold running water to remove all soap and dirt. Ensure that no detergent residue is left behind, as this can attract more dirt over time.

Step 6: Dry the Laces

Lay the laces flat on a clean towel and pat them dry. Allow them to air dry completely before re-lacing your shoes. Avoid using a dryer, as the heat can cause shrinkage or damage to the fabric.

Alternative Methods for Cleaning White Laces

If the traditional soap and water method doesn’t do the trick, there are several alternative cleaning methods you can try. These techniques use common household items and can be very effective in restoring the whiteness of your laces.

1. Baking Soda and Vinegar

Baking soda and vinegar are powerful natural cleaners that can be used to whiten laces. Create a paste by mixing equal parts baking soda and water, and then apply it to the laces. Next, pour a small amount of vinegar over the laces, allowing it to foam. After a few minutes, scrub and rinse the laces thoroughly.

2. Hydrogen Peroxide

Hydrogen peroxide is a bleaching agent that can effectively whiten laces. Mix hydrogen peroxide with a little water and soak the laces in the solution for 30 minutes. Rinse thoroughly and let them air dry.

3. Toothpaste

Toothpaste, especially whitening varieties, can be used to clean white laces. Apply a small amount of toothpaste to an old toothbrush and scrub the laces. Rinse well after cleaning.

4. Bleach (Use with Caution)

Bleach can be used for heavily stained white laces, but it must be diluted properly to avoid damaging the fabric. Mix a small amount of bleach with water and soak the laces for a short time. Rinse thoroughly and dry. Use this method sparingly, as frequent bleaching can weaken the laces.

Mistakes to Avoid When Cleaning White Laces

Cleaning white laces is straightforward, but some common mistakes can lead to less-than-ideal results. Avoid these pitfalls to ensure your laces come out looking their best.

1. Using Hot Water

Hot water can cause white laces to shrink and the fabric to weaken. Always use warm or cold water when cleaning your laces.

2. Skipping the Soak

Soaking the laces is an essential step that helps to loosen dirt and stains. Don’t skip this step, as it makes the cleaning process much more effective.

3. Using Harsh Chemicals

While bleach and other strong chemicals can be effective, they can also damage the fabric if not used correctly. Always dilute harsh chemicals and use them sparingly.

4. Not Rinsing Thoroughly

Residual soap or cleaner left on the laces can attract more dirt, leading to faster discoloration. Make sure to rinse your laces thoroughly.

5. Drying in Direct Sunlight

While it’s fine to air dry your laces, avoid placing them in direct sunlight, which can cause yellowing or fading of the fabric.

How to Maintain Clean White Laces

Once your laces are clean, there are a few tips you can follow to keep them looking fresh for longer.

1. Regular Cleaning

Don’t wait until your laces are heavily soiled before cleaning them. Regular cleaning, even when they appear only slightly dirty, can prevent deep stains from setting in.

2. Use a Protective Spray

Applying a fabric protector to your laces can help repel dirt and stains, keeping them cleaner for longer. Look for sprays that are safe for use on fabrics.

3. Store Shoes Properly

When not in use, store your shoes in a cool, dry place away from direct sunlight. This helps prevent the laces from yellowing or becoming discolored.

4. Alternate Laces

If you have multiple pairs of shoes, consider alternating the laces to reduce wear and tear. This also allows you to clean one set of laces while using another.

5. Re-lacing Properly

When putting the laces back in your shoes, make sure they are threaded evenly and not twisted. This not only looks better but also prevents uneven wear on the laces.

Cleaning white laces doesn’t have to be a daunting task. With the right methods and a little care, you can keep your laces looking bright and new, enhancing the overall appearance of your shoes. Whether you opt for traditional methods like soap and water or try alternative solutions like baking soda and vinegar, the key is consistency and attention to detail.

By following the tips in this guide, you’ll not only learn how to clean white laces effectively but also how to maintain them so they stay in pristine condition for as long as possible. So next time you notice your white laces looking a bit dull, remember these steps and bring them back to life with ease.

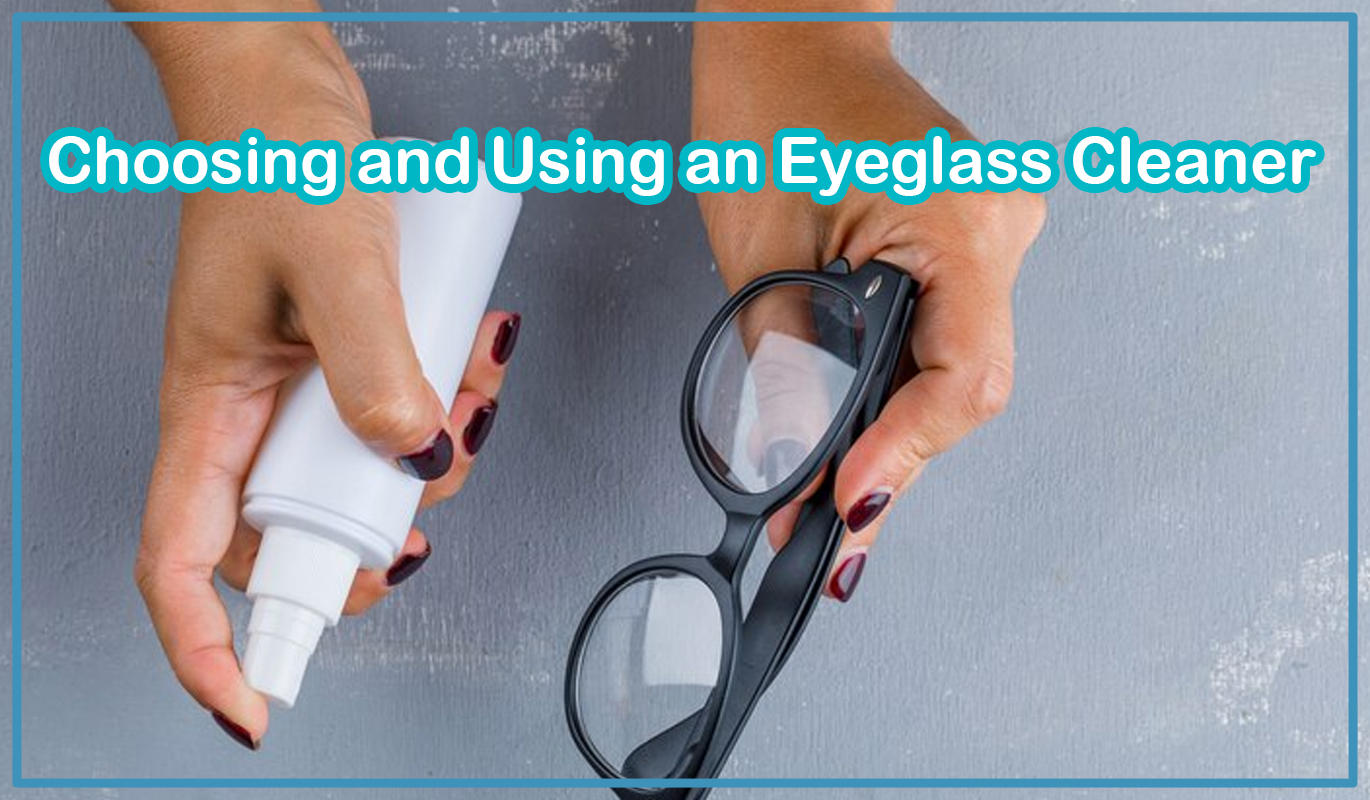
Choosing and Using an Eyeglass Cleaner

0

Keeping your eyeglasses clean is essential not only for clear vision but also for the longevity of your lenses. Whether you wear glasses for reading, driving, or all-day use, a proper eyeglass cleaner can make a significant difference in how well your lenses perform and how long they last. In this comprehensive guide, we’ll explore everything you need to know about eyeglass cleaners, from choosing the right products to using them effectively. We’ll also dive into some common mistakes to avoid, ensuring you get the best results every time.

Why Eyeglass Cleaner is Essential

Your eyeglasses are exposed to a variety of elements throughout the day, including dust, oils from your skin, and environmental pollutants. Over time, these substances can build up on your lenses, causing smudges, streaks, and even scratches. Regularly cleaning your glasses with a suitable eyeglass cleaner helps maintain the clarity of your lenses, improves your vision, and prevents potential damage.

Benefits of Using a Proper Eyeglass Cleaner

  1. Clear Vision: A good eyeglass cleaner removes smudges, dirt, and oils, ensuring you have the clearest possible view through your lenses.
  2. Lens Longevity: Regular cleaning with a suitable product can help prevent scratches and other damage, extending the life of your lenses.
  3. Comfort: Clean lenses reduce eye strain, making it more comfortable to wear your glasses for extended periods.
  4. Hygiene: A proper cleaner eliminates bacteria and germs that can accumulate on your lenses, contributing to better eye health.

Types of Eyeglass Cleaners

There are several types of eyeglass cleaners available, each with its advantages. Understanding the differences between these options can help you choose the best product for your needs.

1. Spray Cleaners

Spray cleaners are one of the most popular options for cleaning eyeglasses. They come in small bottles and are easy to use. Simply spray the cleaner onto your lenses and wipe them clean with a microfiber cloth.

2. Lens Wipes

Lens wipes are pre-moistened, disposable towelettes that are specifically designed for cleaning eyeglasses. They are convenient for on-the-go use and provide a quick and effective cleaning solution.

3. Foam Cleaners

Foam cleaners are less common but highly effective. They come in aerosol cans and expand into foam when applied to the lenses. Foam cleaners are excellent for breaking down stubborn dirt and oils.

4. Liquid Concentrates

Liquid concentrates are typically diluted with water and can be used to clean not just eyeglasses but other optical surfaces as well. They are economical and versatile but require more preparation than other types.

5. DIY Eyeglass Cleaners

For those who prefer a natural approach, DIY eyeglass cleaners can be made at home using ingredients like distilled water, vinegar, and a small amount of dish soap. While these can be effective, they may not offer the same level of cleaning as commercial products.

How to Choose the Best Eyeglass Cleaner

When selecting an eyeglass cleaner, it’s important to consider several factors to ensure you’re getting the best product for your needs.

1. Lens Compatibility

Ensure that the cleaner you choose is safe for use on the type of lenses you have. Some cleaners are designed for specific lens coatings, such as anti-reflective or blue light filter coatings.

2. Effectiveness

Look for a cleaner that effectively removes smudges, dirt, and oils without leaving streaks. Reading reviews and product descriptions can help you determine how well a cleaner performs.

3. Ease of Use

Consider how easy the cleaner is to use. Spray cleaners and wipes are generally the most convenient options, while liquid concentrates may require more effort to prepare and use.

4. Portability

If you need a cleaner that you can take with you on the go, look for compact options like travel-sized spray bottles or individually wrapped lens wipes.

5. Ingredients

Check the ingredients list to ensure the cleaner does not contain harsh chemicals that could damage your lenses. Look for alcohol-free and ammonia-free formulas, which are safer for most lenses.

Step-by-Step Guide to Cleaning Your Eyeglasses

Cleaning your eyeglasses properly is crucial for maintaining their clarity and longevity. Follow these steps to ensure your lenses stay in top condition.

Step 1: Rinse Your Glasses with Water

Before applying any cleaner, rinse your glasses under lukewarm water to remove loose dirt and debris. This helps prevent scratching when you wipe the lenses.

Step 2: Apply the Eyeglass Cleaner

Spray the cleaner onto both sides of each lens. If you’re using lens wipes or a DIY cleaner, apply it according to the product instructions.

Step 3: Wipe the Lenses

Use a clean microfiber cloth to gently wipe the lenses in a circular motion. Avoid using tissues, paper towels, or your clothing, as these materials can scratch the lenses.

Step 4: Clean the Frames

Don’t forget to clean the frames of your glasses as well. Use the same cleaner or a damp cloth to wipe down the arms, nose pads, and other parts of the frame.

Step 5: Inspect and Buff

After cleaning, inspect your glasses for any remaining smudges or streaks. If needed, give the lenses a final buff with a dry microfiber cloth.

Common Mistakes to Avoid When Cleaning Eyeglasses

Even with the best intentions, it’s easy to make mistakes when cleaning your glasses. Avoid these common pitfalls to keep your lenses in excellent condition.

1. Using Harsh Chemicals

Never use household cleaners, window cleaners, or products containing alcohol or ammonia on your lenses. These substances can damage lens coatings and cause them to deteriorate.

2. Using Paper Products

Avoid using paper towels, tissues, or napkins to clean your glasses. These materials can scratch the lenses and leave behind lint.

3. Skipping the Rinse

Always rinse your glasses with water before cleaning them to remove any loose debris. This step helps prevent scratches when you wipe the lenses.

4. Overusing Cleaning Products

Using too much cleaner can leave a residue on your lenses, leading to streaks and smudges. A small amount of cleaner is usually sufficient for effective cleaning.

5. Neglecting the Frames

Cleaning the lenses is important, but don’t forget to clean the frames as well. Dirt and oils can accumulate on the frames, affecting their appearance and comfort.

How Often Should You Clean Your Eyeglasses?

The frequency of cleaning your eyeglasses depends on how often you wear them and the conditions they’re exposed to. Here are some general guidelines:

  • Daily: Wipe your glasses with a microfiber cloth at the end of each day to remove smudges and oils.
  • Weekly: Perform a more thorough cleaning with an eyeglass cleaner to remove any buildup of dirt and grime.
  • As Needed: Clean immediately if you notice smudges, fingerprints, or other contaminants that affect your vision.

DIY Eyeglass Cleaner: A Simple and Effective Recipe

If you prefer a more natural approach or find yourself in a pinch without a commercial cleaner, you can make your eyeglass cleaner at home.

Ingredients:

  • 1 part distilled water
  • 1 part isopropyl alcohol (70% concentration)
  • A few drops of mild dish soap

Instructions:

  1. Mix the distilled water and isopropyl alcohol in a spray bottle.
  2. Add a few drops of mild dish soap and shake gently to combine.
  3. Spray a small amount of the mixture onto your lenses and wipe with a microfiber cloth.
  4. Rinse the lenses with water if needed, and buff them dry with a clean cloth.

Choosing the right eyeglass cleaner and using it properly is essential for maintaining the clarity and longevity of your lenses. Whether you prefer a spray cleaner, lens wipes, or a DIY solution, regular cleaning will ensure your glasses remain in top condition, providing you with clear vision and comfort.

By following the tips and guidelines in this article, you can avoid common mistakes and keep your eyeglasses looking and performing like new ones. Remember, a little care goes a long way in preserving the quality of your lenses, so make cleaning your glasses a regular part of your routine.

Guide to Cleaning a Leather Steering Wheel

0

Keeping your car’s leather steering wheel clean and well-maintained is essential for both the appearance and longevity of your vehicle’s interior. Leather steering wheels are luxurious, durable, and comfortable, but they require regular care to maintain their look and feel. In this comprehensive guide, we will explore the best practices for cleaning a leather steering wheel, including expert tips and tricks to keep it looking brand new.

Why Cleaning a Leather Steering Wheel is Important

Your steering wheel is one of the most touched surfaces in your car, making it prone to dirt, oils, and grime buildup. Over time, this can lead to discoloration, wear, and even cracking if not properly maintained. Regular cleaning not only preserves the leather’s appearance but also enhances your driving experience by keeping the surface smooth and comfortable.

Benefits of Regularly Cleaning Your Leather Steering Wheel

  1. Prolongs the Life of the Leather: Regular cleaning helps prevent the leather from drying out, cracking, or fading, ensuring it remains supple and attractive for years to come.
  2. Improves Grip and Comfort: A clean steering wheel provides better grip, making it safer to drive, and enhances your overall comfort behind the wheel.
  3. Maintains the Vehicle’s Value: Well-maintained leather interiors, including the steering wheel, can significantly boost the resale value of your car.
  4. Removes Dirt, Oils, and Germs: Regular cleaning removes dirt, oils from your hands, and potentially harmful germs, keeping your car’s interior hygienic.

Essential Supplies for Cleaning a Leather Steering Wheel

Before you start cleaning your leather steering wheel, it’s important to gather the right supplies. Here’s what you’ll need:

1. Leather Cleaner

A quality leather cleaner is specifically formulated to gently clean leather surfaces without damaging them. Avoid using harsh chemicals or household cleaners, as they can strip the leather of its natural oils and cause it to dry out.

2. Leather Conditioner

After cleaning, it’s essential to apply a leather conditioner. This product helps to restore the leather’s natural oils, keeping it soft, supple, and resistant to wear.

3. Soft Microfiber Cloth

A soft microfiber cloth is ideal for both cleaning and conditioning leather. It’s gentle enough not to scratch the surface but effective at picking up dirt and grime.

4. Soft-Bristle Brush (Optional)

For more stubborn dirt or grime, a soft-bristle brush can help lift debris from the leather’s surface without causing damage.

5. Warm Water

Warm water can be used to dampen the microfiber cloth, making it easier to wipe down the leather surface. It helps in loosening dirt without soaking the leather.

Step-by-Step Guide to Cleaning a Leather Steering Wheel

Cleaning a leather steering wheel isn’t difficult, but it does require some care to avoid damaging the leather. Follow these steps to ensure your steering wheel stays in top condition:

Step 1: Pre-Cleaning Preparation

Start by parking your car in a shaded area to avoid the sun drying out the leather while you work. Make sure the steering wheel is cool to the touch before beginning the cleaning process.

Step 2: Dust and Wipe Down the Steering Wheel

Using a dry microfiber cloth, gently wipe down the steering wheel to remove any loose dust and dirt. This initial step helps prevent scratches during the cleaning process.

Step 3: Apply the Leather Cleaner

Spray a small amount of leather cleaner onto a microfiber cloth, not directly onto the steering wheel. Gently rub the cleaner into the leather in circular motions, ensuring you cover the entire surface. Pay extra attention to areas that are frequently touched, as they tend to accumulate more dirt and oils.

Step 4: Clean the Stitching and Grooves

If your steering wheel has stitching or grooves, use a soft-bristle brush to clean these areas. Dip the brush in a small amount of leather cleaner and gently scrub the stitching to remove any dirt or grime.

Step 5: Wipe Off Excess Cleaner

After cleaning, use a clean, damp microfiber cloth to wipe off any excess cleaner from the steering wheel. Make sure the cloth is only slightly damp to avoid soaking the leather.

Step 6: Apply Leather Conditioner

Once the steering wheel is clean and dry, apply a small amount of leather conditioner to a microfiber cloth. Gently rub the conditioner into the leather, ensuring even coverage. This step is crucial for maintaining the leather’s softness and preventing it from drying out.

Step 7: Buff the Steering Wheel

After the conditioner has been absorbed, use a clean, dry microfiber cloth to buff the steering wheel. This will remove any excess conditioner and give the leather a nice shine.

Step 8: Final Inspection

Inspect the steering wheel to ensure all areas are clean and conditioned. If you notice any missed spots, repeat the cleaning and conditioning process as needed.

Common Mistakes to Avoid When Cleaning a Leather Steering Wheel

Even with the best intentions, it’s easy to make mistakes when cleaning a leather steering wheel. Avoid these common pitfalls to keep your leather in pristine condition:

1. Using Harsh Chemicals

Never use household cleaners, bleach, or ammonia-based products on your leather steering wheel. These harsh chemicals can strip the leather of its natural oils, leading to cracking and fading.

2. Over-Saturating the Leather

Using too much water or cleaner can cause the leather to become over-saturated, leading to water stains and damage. Always use a damp, not wet, cloth when cleaning.

3. Skipping the Conditioner

Failing to apply a conditioner after cleaning can leave your leather steering wheel dry and prone to cracking. Conditioning is essential for maintaining the leather’s suppleness.

4. Not Cleaning Regularly

Waiting too long between cleanings can allow dirt and oils to build up, making it harder to remove and increasing the risk of permanent damage. Regular maintenance is key.

5. Using Abrasive Tools

Avoid using rough or abrasive tools, such as scouring pads or stiff brushes, on your leather steering wheel. These can scratch the leather and cause irreversible damage.

How Often Should You Clean Your Leather Steering Wheel?

The frequency of cleaning your leather steering wheel depends on how often you use your vehicle and the conditions it’s exposed to. However, as a general rule:

  • Weekly: Wipe down the steering wheel with a dry microfiber cloth to remove surface dust and dirt.
  • Monthly: Perform a more thorough cleaning with a leather cleaner and conditioner to maintain the leather’s quality.
  • As Needed: Clean immediately after any spills or when you notice dirt and grime buildup.

DIY Leather Steering Wheel Cleaner: A Natural Alternative

If you prefer using natural products, you can create your leather cleaner at home. Here’s a simple recipe that’s safe for leather surfaces:

Ingredients:

  • 1/2 cup of white vinegar
  • 1/4 cup of olive oil
  • 10 drops of essential oil (optional for scent)

Instructions:

  1. Mix the white vinegar and olive oil in a spray bottle.
  2. Add essential oil if desired for a pleasant scent.
  3. Shake well before each use.
  4. Spray a small amount onto a microfiber cloth and gently clean the steering wheel.
  5. Follow up with a dry cloth to buff the leather to a shine.

Cleaning a leather steering wheel is an essential part of maintaining your vehicle’s interior. With the right products and techniques, you can keep your steering wheel looking and feeling like new for years to come. Whether you opt for a commercial leather cleaner or a DIY solution, regular cleaning and conditioning will preserve the leather’s beauty and ensure a comfortable driving experience.

By following the steps outlined in this guide, you’ll not only keep your leather steering wheel in top condition but also enhance the overall aesthetic and value of your car. Remember, consistency is key when it comes to leather care, so make cleaning your steering wheel a regular part of your car maintenance routine.

Choosing and Using the Best Glass Cooktop Cleaner

0

Glass cooktops are a popular choice for modern kitchens, thanks to their sleek appearance and ease of use. However, maintaining that pristine look requires regular cleaning and the right products. Whether dealing with everyday spills or stubborn stains, using the best glass cooktop cleaner is essential for keeping your kitchen looking its best. This comprehensive guide explores everything you need to know about choosing and using a glass cooktop cleaner, including expert tips to ensure your cooktop stays sparkling clean.

Why Use a Glass Cooktop Cleaner?

Glass cooktops are designed for functionality and aesthetics but require specific care to avoid scratches and stains. Regular all-purpose cleaners might not be effective or safe for glass surfaces. This is where specialized glass cooktop cleaners come in. These cleaners are formulated to tackle tough stains, grease, and grime without damaging the delicate surface of your cooktop.

Benefits of Using a Glass Cooktop Cleaner

  1. Streak-Free Finish: One of the primary benefits of using a glass cooktop cleaner is the streak-free finish it provides. Unlike general cleaners, these products are designed to leave your cooktop looking shiny and new.
  2. Removes Tough Stains: From burnt-on food to grease splatters, glass cooktop cleaners are effective at removing even the toughest stains, restoring the surface to its original condition.
  3. Protects the Surface: Regular use of a glass cooktop cleaner helps protect the surface from scratches and damage, prolonging the life of your appliance.
  4. Easy to Use: Most glass cooktop cleaners are easy to apply and require minimal effort to achieve professional results.

How to Choose the Best Glass Cooktop Cleaner

With so many products on the market, choosing the right glass cooktop cleaner can be overwhelming. Here are some factors to consider when selecting the best cleaner for your needs:

1. Formulation

The formulation of the cleaner is crucial. Look for a product that is specifically designed for glass cooktops. These cleaners are typically non-abrasive, meaning they won’t scratch the surface while still being effective at removing stains.

2. Ease of Application

Consider how easy the cleaner is to apply. Some products come in spray bottles, while others are in liquid or cream form. Choose a cleaner that fits your cleaning routine and is convenient for you to use.

3. Residue-Free Formula

A good glass cooktop cleaner should not leave behind any residue. Residue can attract more dirt and grime, making the surface appear dull. Look for a cleaner that promises a residue-free finish.

4. Price and Value

While price is an important consideration, it’s also essential to consider the value for money. A slightly more expensive cleaner might offer better results and last longer, making it a better investment in the long run.

5. Environmental Impact

If you’re environmentally conscious, look for eco-friendly glass cooktop cleaners. These products are free from harsh chemicals and are biodegradable, making them safer for both your home and the environment.

Top Glass Cooktop Cleaners on the Market

Now that you know what to look for in a glass cooktop cleaner, let’s explore some of the top products available on the market:

1. Weiman Glass Cooktop Cleaner

Weiman is a well-known brand in the world of kitchen cleaners, and their glass cooktop cleaner is a top choice for many homeowners. This product is designed to clean, shine, and protect glass cooktops, leaving a streak-free finish every time. It’s non-abrasive, making it safe for daily use.

2. Cerama Bryte Cooktop Cleaner

Cerama Bryte is another highly recommended product. It’s particularly effective at removing burnt-on food and tough stains. The cleaner comes with a specially designed cooktop pad that helps to scrub away stubborn residue without scratching the surface.

3. Bar Keepers Friend Cooktop Cleaner

Bar Keepers Friend is known for its powerful cleaning abilities, and their cooktop cleaner is no exception. This cleaner works well on glass, ceramic, and induction cooktops, making it a versatile choice. It’s also great for removing hard water stains and mineral deposits.

4. Affresh Cooktop Cleaner

Affresh is a trusted name in appliance cleaning, and their cooktop cleaner is designed to tackle the toughest messes. It’s safe for all glass and ceramic cooktops and leaves a protective layer that helps prevent future stains.

5. Scotch-Brite Cooktop Cleaner Kit

Scotch-Brite offers a complete cleaning kit that includes a cooktop cleaner and a non-scratch pad. This kit is perfect for those who want an all-in-one solution for maintaining their glass cooktop. The cleaner is effective at removing grease and grime without leaving streaks.

How to Clean Your Glass Cooktop Like a Pro

Using the right glass cooktop cleaner is just one part of the equation. Proper cleaning techniques are equally important to ensure your cooktop stays in top condition. Follow these steps to clean your glass cooktop like a pro:

Step 1: Allow the Cooktop to Cool

Before you start cleaning, make sure your cooktop is completely cool. Cleaning a hot cooktop can cause burns and may also lead to streaks and smudges.

Step 2: Wipe Away Loose Debris

Use a soft cloth or sponge to wipe away any loose debris, such as crumbs or spilled liquids. This will make the cleaning process easier and prevent scratching.

Step 3: Apply the Glass Cooktop Cleaner

Apply a small amount of the glass cooktop cleaner to the surface. If you’re using a spray, spray it evenly across the cooktop. For creams or liquids, apply directly to the stains or the entire surface, depending on the product instructions.

Step 4: Scrub Gently

Use a non-abrasive pad or cloth to scrub the cooktop gently. Focus on areas with stubborn stains or burnt-on food. Avoid using steel wool or abrasive sponges, as these can scratch the glass.

Step 5: Wipe Clean and Buff

Once you’ve scrubbed the entire surface, use a clean, damp cloth to wipe away the cleaner and any remaining residue. Finally, buff the cooktop with a dry cloth to achieve a streak-free shine.

Step 6: Regular Maintenance

To keep your glass cooktop looking its best, make cleaning a regular part of your routine. Wipe down the cooktop after each use, and deep clean once a week or as needed.

DIY Glass Cooktop Cleaner: An Eco-Friendly Alternative

If you prefer a more natural approach, you can make your glass cooktop cleaner using ingredients you likely already have at home. Here’s a simple recipe:

Ingredients:

  • 1 cup of white vinegar
  • 1 cup of water
  • 1 tablespoon of baking soda
  • 5 drops of essential oil (optional)

Instructions:

  1. Mix the vinegar and water in a spray bottle.
  2. Add the baking soda and essential oil, and shake well.
  3. Spray the mixture onto your cooktop and let it sit for a few minutes.
  4. Wipe clean with a soft cloth, and buff to a shine.

Common Mistakes to Avoid When Cleaning a Glass Cooktop

Even with the best glass cooktop cleaner, certain mistakes can undermine your efforts. Avoid these common pitfalls to keep your cooktop in pristine condition:

1. Using Abrasive Cleaners

Never use abrasive cleaners or tools on your glass cooktop. These can scratch the surface and cause permanent damage. Stick to non-abrasive cleaners and soft cloths or pads.

2. Not Cleaning Spills Immediately

Allowing spills to sit on the cooktop can lead to stubborn stains that are difficult to remove. Clean up spills as soon as the cooktop cools to prevent staining.

3. Overusing Cleaner

Using too much cleaner can leave a residue that’s difficult to remove. Follow the product instructions and use only the recommended amount.

4. Ignoring the Manufacturer’s Instructions

Always follow the manufacturer’s instructions for both the cooktop and the cleaner. This ensures you’re using the products safely and effectively.

Maintaining a glass cooktop doesn’t have to be a chore. With the right glass cooktop cleaner and proper cleaning techniques, you can keep your cooktop looking like new for years to come. Whether you choose a commercial product or a DIY solution, the key is consistency and care. By following the tips and advice in this guide, you’ll be well-equipped to tackle any mess and enjoy a spotless, gleaming glass cooktop.

Signs That You Are in a Toxic Relationship

0

Relationships are meant to bring joy, support, and love into our lives. However, when a relationship becomes toxic, it can have the opposite effect, causing stress, anxiety, and emotional turmoil. Recognizing the signs of a toxic relationship is crucial for your mental and emotional well-being. In this article, we will explore the various signs of a toxic relationship, how to identify them, and steps you can take to address the situation. By incorporating high-volume, low-competition keywords, this article aims to offer valuable insights while optimizing for search engines.

Understanding Toxic Relationships

A toxic relationship is one where the negative aspects outweigh the positive, and where one or both partners consistently display harmful behaviors. These relationships can occur in romantic partnerships, friendships, family relationships, and even work environments. Identifying a toxic relationship early can help prevent long-term emotional damage and promote healthier interactions.

Common Signs of a Toxic Relationship

1. Constant Criticism and Blame

In a toxic relationship, one or both partners may constantly criticize each other. This can range from belittling comments to outright insults. Criticism can be destructive to your self-esteem and can make you feel inadequate or worthless.

2. Lack of Support

Healthy relationships are built on mutual support and encouragement. In a toxic relationship, there is often a lack of support. Your partner may dismiss your achievements, downplay your successes, or show no interest in your goals and dreams.

3. Controlling Behavior

Toxic partners often exhibit controlling behaviors. They may dictate your actions, control your finances, monitor your activities, and isolate you from friends and family. This control can make you feel trapped and powerless.

4. Jealousy and Possessiveness

While some jealousy is natural in relationships, excessive jealousy, and possessiveness are signs of toxicity. A toxic partner may become overly jealous of your interactions with others, constantly accuse you of infidelity, or attempt to control who you can and cannot see.

5. Manipulation and Gaslighting

Manipulation is a common tactic in toxic relationships. Your partner may use guilt, fear, or coercion to manipulate you into doing what they want. Gaslighting, a form of manipulation, involves making you doubt your reality or sanity. This can lead to confusion and a loss of self-trust.

6. Disrespect and Abuse

Disrespect in any form is a clear sign of a toxic relationship. This can include verbal abuse, physical abuse, or emotional abuse. Abusive behavior is never acceptable and can have serious long-term effects on your mental and physical health.

7. Lack of Communication

Effective communication is vital for a healthy relationship. In a toxic relationship, communication often breaks down. Your partner may ignore you, refuse to discuss important issues or use silence as a form of punishment.

8. Constant Conflict

All relationships have conflicts, but in a toxic relationship, conflicts are frequent and intense. Arguments may escalate quickly, and resolution is rarely achieved. This constant state of conflict can be exhausting and damaging.

9. Feeling Drained and Unhappy

A toxic relationship can leave you feeling drained, both emotionally and physically. You may find yourself feeling unhappy, anxious, or depressed more often than not. If a relationship consistently makes you feel worse about yourself, it is likely toxic.

Identifying a Toxic Relationship

Recognizing the signs of a toxic relationship is the first step toward addressing the problem. Here are some strategies to help you identify if you are in a toxic relationship:

1. Self-Reflection

Take time to reflect on your relationship. Consider how it makes you feel and whether the negative aspects outweigh the positive. Ask yourself if your partner’s behavior aligns with the signs of toxicity discussed above.

2. Seek Feedback

Talk to trusted friends or family members about your relationship. They can provide an outside perspective and may help you see things more clearly. Sometimes, those close to you can identify toxic behaviors that you might overlook.

3. Keep a Journal

Keeping a journal can help you track patterns of behavior in your relationship. Note down instances of criticism, manipulation, or conflict. Reviewing your journal entries can reveal recurring issues and help you identify toxic patterns.

4. Professional Help

Consider seeking the help of a therapist or counselor. A professional can provide guidance and support as you navigate your relationship. They can also help you develop strategies to address toxic behaviors and improve your well-being.

Addressing a Toxic Relationship

Once you have identified that you are in a toxic relationship, it is important to take steps to address the situation. Here are some strategies to help you deal with a toxic relationship:

1. Set Boundaries

Establish clear boundaries with your partner. Let them know what behaviors are unacceptable and what the consequences will be if they continue. Enforcing boundaries can help protect your emotional well-being.

2. Open Communication

Try to communicate openly and honestly with your partner about your concerns. Use “I” statements to express how their behavior affects you without blaming them. For example, “I feel hurt when you criticize me constantly.”

3. Seek Support

Surround yourself with a strong support system. Friends, family, and mental health professionals can provide guidance and encouragement as you navigate your relationship. Support from others can help you feel less isolated and more empowered.

4. Prioritize Self-Care

Take care of your mental and physical health. Engage in activities that promote relaxation and well-being, such as exercise, meditation, and hobbies. Prioritizing self-care can help you cope with the stress of a toxic relationship.

5. Evaluate Your Options

Consider whether the relationship is worth continuing. If the toxic behavior persists despite your efforts to address it, it may be necessary to end the relationship. Your well-being should be your top priority.

Moving Forward After a Toxic Relationship

Ending a toxic relationship can be challenging, but it is often necessary for your mental and emotional health. Here are some steps to help you move forward:

1. Allow Yourself to Heal

Give yourself time to heal after ending a toxic relationship. Allow yourself to grieve the loss and process your emotions. Healing is a gradual process, and it is important to be patient with yourself.

2. Rebuild Your Self-Esteem

Focus on rebuilding your self-esteem and confidence. Surround yourself with positive, supportive individuals who uplift and encourage you. Engage in activities that make you feel good about yourself.

3. Reflect and Learn

Reflect on your experience and learn from it. Consider what red flags you may have missed and how you can avoid toxic relationships in the future. Use this experience as an opportunity for personal growth.

4. Set Healthy Relationship Standards

Set clear standards for what you want in future relationships. Establish non-negotiable qualities, such as respect, trust, and mutual support. Having these standards can help you build healthier, more fulfilling relationships.

Recognizing and addressing a toxic relationship is crucial for your mental, emotional, and physical well-being. By identifying the signs of a toxic relationship, reflecting on your experiences, and taking proactive steps to address the situation, you can protect yourself from further harm and create a more positive, supportive social environment. Remember, prioritizing your health and happiness is essential, and sometimes that means making difficult decisions to end toxic relationships. Use the strategies outlined in this article to navigate your journey toward healthier, happier relationships.

Toxic People to Remove from Your Life

0

Navigating relationships can be challenging, especially when certain individuals consistently bring negativity and harm into your life. Identifying and removing toxic people is crucial for maintaining mental health and personal well-being. This comprehensive guide explores various types of toxic individuals, provides strategies for dealing with them, and emphasizes the importance of creating a positive, supportive social circle. By incorporating high-volume, low-competition keywords, this article aims to offer valuable insights while optimizing for search engines.

Identifying Toxic People

1. The Manipulator

Manipulators are experts at controlling others to achieve their own goals. They often use deceit, guilt, and psychological pressure to influence your actions. These individuals can erode your self-esteem and make you doubt your decisions.

2. The Critic

Critics constantly find fault with everything you do, often under the guise of “constructive criticism.” While some feedback can be helpful, perpetual criticism can undermine your confidence and lead to self-doubt.

3. The Victim

Victims always have something wrong in their lives and never take responsibility for their problems. They drain your energy with their constant complaints and refusal to seek solutions.

4. The Narcissist

Narcissists are self-centered and lack empathy for others. They expect special treatment and can be highly manipulative to maintain their inflated sense of self-importance.

5. The Drama Queen/King

Drama queens and kings thrive on chaos and conflict. They often create unnecessary drama, making every situation about themselves and causing stress and anxiety for those around them.

6. The Control Freak

Control freaks need to dominate every aspect of their lives and the lives of those around them. They can be overbearing, dictating how things should be done and leaving little room for your input or autonomy.

7. The Gossip

Gossips thrive on spreading rumors and secrets. They can be dangerous because they often distort the truth and damage reputations, leading to distrust and conflict within social circles.

The Impact of Toxic People on Your Life

Toxic people can have profound negative effects on your mental and emotional well-being. Understanding these impacts can motivate you to take action and remove such individuals from your life.

1. Mental Health

Toxic relationships can lead to increased stress, anxiety, and depression. Constant negativity and manipulation can make you feel overwhelmed and helpless.

2. Self-Esteem

Being around toxic individuals can erode your self-esteem. Their constant criticism and manipulative behavior can make you doubt your worth and capabilities.

3. Physical Health

The stress caused by toxic people can also manifest physically. You may experience symptoms such as headaches, fatigue, and even weakened immune function.

4. Relationships

Toxic individuals can damage your relationships with others. They can create conflicts, spread rumors, and isolate you from supportive friends and family.

Strategies for Dealing with Toxic People

1. Set Boundaries

Establish clear boundaries with toxic individuals. Let them know what behaviors are unacceptable and stick to your limits.

2. Limit Contact

Minimize your interactions with toxic people. If possible, avoid spending time with them and focus on maintaining relationships with positive, supportive individuals.

3. Communicate Assertively

When dealing with toxic people, communicate your needs and feelings assertively. Use “I” statements to express how their behavior affects you without blaming them.

4. Seek Support

Surround yourself with a strong support system. Friends, family, and mental health professionals can provide guidance and encouragement as you navigate toxic relationships.

5. Prioritize Self-Care

Take care of your mental and physical health. Engage in activities that promote relaxation and well-being, such as exercise, meditation, and hobbies.

When to Cut Ties

In some cases, setting boundaries and limiting contact may not be enough. Here are signs that it might be time to cut ties with a toxic person entirely.

1. Repeated Boundary Violations

If a toxic person continually disregards your boundaries, it may be necessary to end the relationship. Respect is crucial in any relationship, and repeated violations indicate a lack of regard for your well-being.

2. Emotional and Physical Abuse

Abuse of any kind is unacceptable. If you are experiencing emotional or physical abuse, seek help immediately and distance yourself from the abuser.

3. Constant Negativity

If a person consistently brings negativity into your life and refuses to change their behavior, it might be best to cut ties. Chronic negativity can drain your energy and impact your overall happiness.

4. Manipulation and Deceit

Suppose a person frequently manipulates and deceives you. In that case, it is a clear sign of a toxic relationship. Trust is essential, and a lack of honesty can be detrimental to your mental health.

The Benefits of Removing Toxic People

Removing toxic people from your life can lead to numerous positive changes. Here are some benefits you might experience.

1. Improved Mental Health

Without the constant stress and negativity, you may notice an improvement in your mental health. Common benefits include reduced anxiety, increased happiness, and a better overall mood.

2. Enhanced Self-Esteem

Surrounding yourself with supportive individuals can boost your self-esteem. Positive reinforcement and genuine encouragement can help you regain confidence.

3. Healthier Relationships

With toxic individuals out of the picture, you can focus on building healthier, more fulfilling relationships. Trust and mutual respect will become the foundation of your social interactions.

4. Greater Personal Growth

Removing toxic people allows you to focus on personal growth. You can pursue your goals and interests without negativity and manipulation.

Recognizing and removing toxic people from your life is essential for your mental, emotional, and physical well-being. By identifying various types of toxic individuals, understanding their impact, and implementing strategies to deal with them, you can create a more positive and supportive social environment. Remember, prioritizing your health and happiness is crucial, and sometimes that means making difficult decisions to cut ties with those who bring harm into your life.

The Best Natural Ingredients for Healthy, Glowing Skin

0

Achieving healthy, glowing skin doesn’t always require expensive products or complicated routines. Nature offers a variety of powerful ingredients that can help you attain a radiant complexion. In this comprehensive guide, we’ll explore the best natural ingredients for skin health, their benefits, and how to incorporate them into your skincare regimen. These ingredients are not only effective but also gentle on the skin, making them ideal for all skin types.

1. Aloe Vera

Benefits:

  • Hydration: Aloe vera is a natural humectant, meaning it helps retain moisture in the skin.
  • Soothing: It has anti-inflammatory properties that can calm irritated or sunburned skin.
  • Healing: Promotes wound healing and reduces scarring.

How to Use:

  • Aloe Vera Gel: Apply pure aloe vera gel directly to the skin as a moisturizer or after-sun treatment.
  • DIY Masks: Mix aloe vera gel with honey and turmeric for a soothing face mask.

2. Honey

Benefits:

  • Antibacterial: Honey has natural antibacterial properties that can help treat and prevent acne.
  • Moisturizing: It acts as a humectant, drawing moisture into the skin and keeping it hydrated.
  • Antioxidant: Rich in antioxidants, honey can help fight free radicals and slow down the aging process.

How to Use:

  • Face Masks: Apply raw honey directly to the face as a mask or mix with ingredients like yogurt and oatmeal.
  • Spot Treatment: Use honey as a spot treatment for pimples and acne scars.

3. Coconut Oil

Benefits:

  • Moisturizing: Coconut oil is an excellent moisturizer, especially for dry skin.
  • Antimicrobial: It has antimicrobial properties that can help with skin infections.
  • Anti-inflammatory: Reduces inflammation and soothes irritated skin.

How to Use:

  • Moisturizer: Use coconut oil as a daily moisturizer or mix it with your favorite lotion.
  • Makeup Remover: Apply a small amount to a cotton pad to remove makeup gently.

4. Green Tea

Benefits:

  • Antioxidant: Green tea is rich in antioxidants that protect the skin from environmental damage.
  • Anti-inflammatory: It reduces inflammation and can soothe conditions like rosacea and acne.
  • Anti-aging: The polyphenols in green tea can help reduce signs of aging and improve skin elasticity.

How to Use:

  • Toner: Brew green tea, let it cool, and use it as a toner.
  • Face Masks: Mix green tea powder (matcha) with honey or yogurt for a rejuvenating face mask.

5. Rosehip Oil

Benefits:

  • Moisturizing: Rosehip oil is packed with essential fatty acids that hydrate the skin.
  • Brightening: It contains vitamins A and C, which help brighten the skin and reduce hyperpigmentation.
  • Anti-aging: The antioxidants in rosehip oil can reduce the appearance of fine lines and wrinkles.

How to Use:

  • Serum: Apply a few drops of rosehip oil to the face after cleansing and before moisturizing.
  • Face Oil: Mix with other oils like jojoba or argan for a nourishing facial oil blend.

6. Turmeric

Benefits:

  • Anti-inflammatory: Turmeric has potent anti-inflammatory properties that can help calm the skin.
  • Brightening: It can reduce dark spots and give the skin a natural glow.
  • Antibacterial: Helps fight acne-causing bacteria.

How to Use:

  • Face Masks: Mix turmeric powder with yogurt, honey, or milk to create a brightening face mask.
  • Spot Treatment: Combine turmeric with water to make a paste and apply it to pimples.

7. Avocado

Benefits:

  • Moisturizing: Avocado is rich in healthy fats that deeply moisturize the skin.
  • Nourishing: It contains vitamins E and C, which are essential for skin health.
  • Healing: The antioxidants in avocado help repair damaged skin.

How to Use:

  • Face Masks: Mash avocado and mix with honey or olive oil for a nourishing mask.
  • Moisturizer: Use avocado oil as a facial oil or add it to your moisturizer.

8. Cucumber

Benefits:

  • Hydration: Cucumber has a high water content that helps hydrate the skin.
  • Soothing: It has a cooling effect that can soothe irritated or sunburned skin.
  • Anti-inflammatory: Reduces puffiness and dark circles under the eyes.

How to Use:

  • Eye Pads: Place cucumber slices over the eyes to reduce puffiness.
  • Face Masks: Blend cucumber with yogurt or honey for a hydrating mask.

9. Oatmeal

Benefits:

  • Soothing: Oatmeal can relieve itchy and irritated skin.
  • Moisturizing: It helps lock in moisture and keep the skin hydrated.
  • Cleansing: Acts as a gentle exfoliant and cleanser.

How to Use:

  • Face Masks: Mix oatmeal with honey or yogurt for a soothing mask.
  • Bath Soak: Add oatmeal to your bath for an all-over skin soothing treatment.

10. Witch Hazel

Benefits:

  • Astringent: Witch hazel acts as a natural astringent, tightening the skin and reducing pores.
  • Anti-inflammatory: It can reduce inflammation and redness.
  • Antibacterial: Helps treat acne by fighting bacteria.

How to Use:

  • Toner: Apply witch hazel with a cotton pad after cleansing.
  • Spot Treatment: Use on acne-prone areas to reduce inflammation.

Incorporating natural ingredients into your skincare routine can offer numerous benefits without the risk of harsh chemicals. These ingredients are effective, gentle, and can be found easily. Remember to patch test any new ingredient to ensure you don’t have an adverse reaction. With the right natural ingredients, you can achieve healthy, glowing skin in a safe and sustainable way.

Foods to Avoid During Pregnancy and Why

0

Pregnancy is a crucial time for both the mother and the developing baby. Nutrition plays a vital role in ensuring a healthy pregnancy, and it’s important to be mindful of what you eat. Certain foods can pose risks to the health of the mother and baby, and it’s essential to know which ones to avoid. This article will explore the foods to avoid during pregnancy and explain why they are harmful, helping expectant mothers make informed dietary choices.

Understanding the Importance of Diet During Pregnancy

A balanced diet is vital during pregnancy to provide essential nutrients for the growing baby and maintain the mother’s health. Nutrients such as folic acid, iron, calcium, and protein are particularly important. However, while focusing on these nutrients, it’s equally important to be aware of foods that can be harmful during pregnancy.

Foods to Avoid During Pregnancy

1. Raw or Undercooked Seafood

Why to Avoid: Raw or undercooked seafood, including sushi, oysters, clams, and mussels, can be contaminated with harmful bacteria and parasites, such as Salmonella, Listeria, and Vibrio.

Risks:

  • Listeriosis: Caused by Listeria bacteria, it can lead to severe infections and complications such as miscarriage, premature delivery, and stillbirth.
  • Parasitic Infections: Such as Toxoplasmosis, which can cause serious health issues for the baby, including blindness and intellectual disabilities.

2. Raw or Undercooked Meat and Poultry

Why Avoid: Similar to seafood, raw or undercooked meat and poultry can harbor harmful bacteria like E. coli, Salmonella, and Listeria.

Risks:

  • Foodborne Illnesses: These bacteria can cause severe foodborne illnesses, which can be particularly dangerous during pregnancy.
  • Toxoplasmosis: Undercooked meat can also be a source of Toxoplasma gondii, leading to toxoplasmosis, which can harm the baby.

3. Unpasteurized Dairy Products

Why to Avoid: Unpasteurized milk and dairy products can contain Listeria, Salmonella, and E. coli, which are harmful to pregnant women and their babies.

Risks:

  • Listeriosis: The same risks apply here as with raw seafood, with potential for miscarriage, stillbirth, and severe neonatal infection.
  • Severe Food Poisoning: Unpasteurized products can cause severe food poisoning, which can lead to dehydration and other complications.

4. Certain Types of Fish

Why to Avoid: Some fish contain high levels of mercury, which can be harmful to the developing baby’s brain and nervous system.

Types of Fish to Avoid:

  • High-Mercury Fish: Shark, swordfish, king mackerel, and tilefish.
  • Raw Fish: Such as sushi-grade fish that has not been properly frozen to kill parasites.

Risks:

  • Mercury Poisoning: High levels of mercury can impair fetal brain development and lead to developmental delays and learning disabilities.

5. Raw or Undercooked Eggs

Why to Avoid: Raw or undercooked eggs can be contaminated with Salmonella.

Risks:

  • Salmonellosis: Infection can cause fever, nausea, vomiting, stomach cramps, and diarrhea, which can be particularly severe for pregnant women.

6. Unwashed Fruits and Vegetables

Why to Avoid: Unwashed fruits and vegetables can be contaminated with harmful bacteria and parasites, including Toxoplasma.

Risks:

  • Foodborne Illnesses: Such as E. coli and Salmonella.
  • Toxoplasmosis: This can lead to serious health issues for the baby.

7. Caffeine

Why Limit: High levels of caffeine can cross the placenta and affect the baby’s heart rate and development.

Recommended Limit:

  • Moderation: Limit caffeine intake to less than 200 milligrams per day (about one 12-ounce cup of coffee).

Risks:

  • Miscarriage and Low Birth Weight: High caffeine intake has been linked to an increased risk of miscarriage and low birth weight.

8. Alcohol

Why to Avoid: There is no safe amount of alcohol during pregnancy. Alcohol can lead to Fetal Alcohol Spectrum Disorders (FASDs).

Risks:

  • Fetal Alcohol Syndrome (FAS): Can cause severe developmental delays, intellectual disabilities, and physical abnormalities.
  • Developmental Issues: Even moderate alcohol consumption can lead to developmental and behavioral problems.

9. Processed Foods

Why to Avoid: Processed foods often contain high levels of unhealthy fats, sugars, and additives.

Risks:

  • Excessive Weight Gain: Can lead to gestational diabetes and other complications.
  • Lack of Nutrients: Processed foods often lack essential nutrients needed during pregnancy.

Healthy Alternatives and Tips

1. Cook Seafood and Meat Thoroughly

Safe Practice: Ensure all seafood, meat, and poultry are cooked to safe internal temperatures to kill harmful bacteria and parasites.

2. Choose Pasteurized Products

Safe Practice: Opt for pasteurized milk, cheese, and other dairy products to avoid bacterial contamination.

3. Select Low-Mercury Fish

Safe Practice: Include low-mercury fish in your diet, such as salmon, sardines, and trout, which are rich in omega-3 fatty acids and beneficial for fetal development.

4. Cook Eggs Completely

Safe Practice: Cook eggs until both the yolk and white are firm. Avoid foods made with raw or partially cooked eggs, such as homemade mayonnaise or certain desserts.

5. Wash Fruits and Vegetables Thoroughly

Safe Practice: Wash all fruits and vegetables under running water before eating or cooking them. This reduces the risk of contamination with harmful bacteria and parasites.

6. Moderate Caffeine Intake

Safe Practice: Limit your caffeine consumption to below 200 milligrams per day. Opt for caffeine-free or low-caffeine alternatives, such as herbal teas.

7. Avoid Alcohol Completely

Safe Practice: Abstain from alcohol entirely during pregnancy. Choose non-alcoholic beverages and mocktails as safe alternatives.

8. Focus on Whole Foods

Safe Practice: Prioritize whole, unprocessed foods rich in essential nutrients. Incorporate a variety of fruits, vegetables, lean proteins, and whole grains into your diet.

Maintaining a healthy diet during pregnancy is crucial for the well-being of both the mother and the developing baby. By avoiding certain foods and making mindful dietary choices, expectant mothers can minimize the risks associated with harmful bacteria, parasites, and toxins. Remember to consult with a healthcare provider or nutritionist for personalized advice and to ensure a balanced and safe diet throughout pregnancy.

Implementing these dietary guidelines will not only support a healthy pregnancy but also contribute to the overall health and development of your baby. Prioritize safe, nutritious foods and stay informed about potential risks to navigate your pregnancy with confidence and peace of mind.

Effective Measures Against Acid Reflux

0

Acid reflux, also known as gastroesophageal reflux disease (GERD), is a common condition that affects millions of people worldwide. It occurs when stomach acid flows back into the esophagus, causing symptoms such as heartburn, regurgitation, and discomfort. In this comprehensive guide, we will explore effective measures to manage and prevent acid reflux, ensuring you can live a more comfortable life. We’ll also focus on SEO-friendly strategies to help this article rank high in search engine results.

Understanding Acid Reflux

Before diving into the measures to combat acid reflux, it’s essential to understand what causes this condition and its symptoms.

Causes of Acid Reflux

  1. Hiatal Hernia: A condition where the upper part of the stomach pushes through the diaphragm into the chest.
  2. Lifestyle Factors: Obesity, smoking, and certain dietary habits can contribute to acid reflux.
  3. Dietary Triggers: Foods such as spicy foods, citrus fruits, fatty foods, chocolate, caffeine, and alcohol can trigger acid reflux.
  4. Medications: Certain medications, including NSAIDs and some blood pressure medications, can cause or exacerbate acid reflux.
  5. Pregnancy: Hormonal changes and pressure on the stomach from the growing uterus can lead to acid reflux during pregnancy.

Symptoms of Acid Reflux

  • Heartburn: A burning sensation in the chest that often occurs after eating and may be worse at night.
  • Regurgitation: A sour or bitter-tasting acid backing up into the throat or mouth.
  • Dysphagia: Difficulty swallowing.
  • Chest Pain: Often mistaken for heart-related issues.
  • Chronic Cough: Especially at night.
  • Hoarseness or Sore Throat: Irritation caused by stomach acid.

Effective Measures to Combat Acid Reflux

Now that we understand the causes and symptoms, let’s explore effective measures to manage and prevent acid reflux. These measures can be categorized into lifestyle changes, dietary adjustments, and medical treatments.

1. Lifestyle Changes

Implementing specific lifestyle changes can significantly reduce the frequency and severity of acid reflux symptoms.

Maintain a Healthy Weight

  • Why It Helps: Excess weight can put pressure on the stomach, causing acid to back up into the esophagus.
  • How to Achieve It: Follow a balanced diet, engage in regular physical activity, and consider consulting a nutritionist or dietitian for personalized advice.

Elevate the Head of Your Bed

  • Why It Helps: Gravity can help keep stomach acid from rising into the esophagus while you sleep.
  • How to Achieve It: Use bed risers or a wedge pillow to elevate the head of your bed by 6-8 inches.

Avoid Lying Down After Eating

  • Why It Helps: Lying down can cause the stomach contents to press harder against the lower esophageal sphincter (LES).
  • How to Achieve It: Wait at least 2-3 hours after eating before lying down or going to bed.

Quit Smoking

  • Why It Helps: Smoking can weaken the LES and increase acid production.
  • How to Achieve It: Seek support from smoking cessation programs, use nicotine replacement therapies, or consult your doctor for other options.

Wear Loose-Fitting Clothing

  • Why It Helps: Tight clothing can put pressure on the abdomen and LES.
  • How to Achieve It: Opt for loose and comfortable clothing, especially around the waist.

2. Dietary Adjustments

What you eat and drink plays a significant role in managing acid reflux. Making mindful dietary choices can help reduce symptoms.

Identify and Avoid Trigger Foods

  • Why It Helps: Certain foods can relax the LES or increase stomach acid production.
  • How to Achieve It: Keep a food diary to identify your triggers. Common culprits include:
    • Spicy foods
    • Citrus fruits
    • Tomatoes and tomato-based products
    • Chocolate
    • Caffeine
    • Alcohol
    • Fried and fatty foods

Eat Smaller, More Frequent Meals

  • Why It Helps: Large meals can cause the stomach to distend, putting pressure on the LES.
  • How to Achieve It: Divide your daily intake into 4-6 smaller meals instead of 3 large ones.

Stay Hydrated

  • Why It Helps: Water can help dilute stomach acid and promote digestion.
  • How to Achieve It: Drink plenty of water throughout the day, but avoid large amounts during meals to prevent distension.

Chew Gum

  • Why It Helps: Chewing gum stimulates saliva production, which can help neutralize stomach acid.
  • How to Achieve It: Chew sugar-free gum after meals.

Include Alkaline Foods

  • Why It Helps: Alkaline foods can help neutralize stomach acid.
  • How to Achieve It: Incorporate foods like bananas, melons, oatmeal, and leafy greens into your diet.

3. Medical Treatments

In some cases, lifestyle and dietary changes may not be enough to manage acid reflux, and medical treatment may be necessary.

Over-the-Counter Medications

  • Antacids: Provide quick relief by neutralizing stomach acid. Examples include Tums and Maalox.
  • H2 Receptor Blockers: Reduce acid production. Examples include ranitidine (Zantac) and famotidine (Pepcid).
  • Proton Pump Inhibitors (PPIs): Block acid production and allow time for damaged esophageal tissue to heal. Examples include omeprazole (Prilosec) and esomeprazole (Nexium).

Prescription Medications

  • Stronger PPIs or H2 Blockers: For more severe cases, your doctor may prescribe higher doses.
  • Prokinetics: Help strengthen the LES and improve stomach emptying. Examples include metoclopramide (Reglan) and domperidone.

Surgical Options

For severe cases of GERD that do not respond to medication, surgical options may be considered.

  • Fundoplication: The top of the stomach is wrapped around the LES to strengthen it and prevent reflux.
  • LINX Device: A ring of magnetic beads is placed around the LES to keep it closed when not swallowing.

Natural Remedies and Alternative Therapies

In addition to conventional treatments, some natural remedies and alternative therapies may help alleviate acid reflux symptoms.

1. Herbal Remedies

  • Ginger: Known for its anti-inflammatory properties, ginger can help soothe the stomach. Add fresh ginger to meals or drink ginger tea.
  • Chamomile: Chamomile tea can help reduce stomach inflammation and acid production.
  • Licorice Root: DGL (deglycyrrhizinated licorice) supplements can help protect the esophagus lining.

2. Acupuncture

Acupuncture may help reduce GERD symptoms by promoting relaxation and reducing stress, which can trigger acid reflux.

3. Probiotics

Probiotics can help improve gut health and digestion, potentially reducing the frequency of acid reflux episodes. Include probiotic-rich foods like yogurt, kefir, and sauerkraut in your diet.

Monitoring and Follow-Up

Managing acid reflux requires ongoing monitoring and adjustments to treatment plans.

Keep a Symptom Diary

Track your symptoms, dietary habits, and lifestyle changes to identify patterns and triggers. This information can be helpful when discussing your condition with your healthcare provider.

Regular Check-Ups

Schedule regular check-ups with your healthcare provider to monitor your condition and adjust treatment as needed. Discuss any new or worsening symptoms promptly.

Managing and preventing acid reflux involves a combination of lifestyle changes, dietary adjustments, and medical treatments. By understanding the causes and triggers of acid reflux, you can take proactive steps to reduce symptoms and improve your quality of life. Remember to consult with your healthcare provider before making significant changes to your diet or treatment plan.

With the right approach, you can effectively manage acid reflux and enjoy a healthier, more comfortable life. Stay committed to your treatment plan, seek support when needed, and prioritize your well-being.

When to Try to Conceive Again After a Miscarriage

0

Miscarriage is a devastating experience for any couple, and it can be both emotionally and physically challenging. After experiencing a miscarriage, many couples wonder when it is safe and appropriate to try to conceive again. In this comprehensive guide, we will discuss the factors to consider when deciding to try for another pregnancy, offer advice on emotional healing, and provide tips for preparing your body for a healthy pregnancy.

Understanding Miscarriage

A miscarriage, also known as a spontaneous abortion, is the loss of a pregnancy before the 20th week. Miscarriages are common, occurring in about 10-20% of known pregnancies. The causes of miscarriage can vary, but common reasons include genetic abnormalities, hormonal imbalances, infections, and structural problems with the uterus.

Types of Miscarriage

  1. Chemical Pregnancy: This occurs shortly after implantation, leading to a very early miscarriage. Many women may not even realize they were pregnant.
  2. Missed Miscarriage: The embryo has died, but the body has not expelled the tissue. Often discovered during a routine ultrasound.
  3. Incomplete Miscarriage: Some tissue from the pregnancy remains in the uterus.
  4. Complete Miscarriage: All pregnancy tissue has been expelled from the uterus.
  5. Recurrent Miscarriage: Defined as having two or more consecutive miscarriages.

When to Try Again After a Miscarriage

Deciding when to try to conceive again after a miscarriage involves considering both physical and emotional factors. Here are the key points to consider:

Physical Recovery

  1. Medical Advice: It’s crucial to follow your healthcare provider’s advice regarding physical recovery. Typically, doctors recommend waiting at least one menstrual cycle before trying to conceive again. This allows the body to recover and makes it easier to date the new pregnancy.
  2. Uterine Health: After a miscarriage, the uterus needs time to heal. Waiting a few months can reduce the risk of another miscarriage and ensure a healthier environment for the next pregnancy.
  3. Addressing Underlying Conditions: If there was an underlying medical condition that contributed to the miscarriage, it’s essential to address it before trying to conceive again. Conditions like thyroid disorders, uncontrolled diabetes, or uterine abnormalities should be managed to improve the chances of a healthy pregnancy.

Emotional Recovery

  1. Grieving Process: Miscarriage can be an emotional rollercoaster, and it’s important to give yourself time to grieve and process the loss. Everyone’s timeline for emotional recovery is different, so listen to your feelings and seek support if needed.
  2. Support Systems: Engage with support groups, counseling, or therapy to help navigate the complex emotions associated with miscarriage. Sharing your experience with others who have gone through similar situations can be comforting.
  3. Communication: Open and honest communication with your partner is crucial. Both partners may experience grief differently, and it’s important to support each other through the healing process.

Preparing for a Healthy Pregnancy

When you and your partner feel ready to try to conceive again, there are several steps you can take to prepare your body and mind for a healthy pregnancy.

1. Prenatal Vitamins

Start taking prenatal vitamins even before you conceive. Folic acid, in particular, is essential for preventing neural tube defects in the developing baby. A daily supplement containing at least 400-800 micrograms of folic acid is recommended.

2. Healthy Diet

A balanced diet rich in vitamins, minerals, and other essential nutrients supports overall health and fertility. Focus on:

  • Fruits and Vegetables: Aim for a variety of colors to get a range of nutrients.
  • Whole Grains: Choose whole grains over refined grains to ensure you get enough fiber.
  • Lean Proteins: Incorporate lean meats, fish, beans, and legumes.
  • Dairy: Include dairy products or fortified alternatives for calcium and vitamin D.
  • Healthy Fats: Avocado, nuts, seeds, and olive oil provide healthy fats important for hormone regulation.

3. Regular Exercise

Moderate exercise is beneficial for overall health and can improve fertility. Aim for at least 150 minutes of moderate aerobic activity or 75 minutes of vigorous activity each week, along with muscle-strengthening activities on two or more days a week.

4. Avoid Harmful Substances

Avoid smoking, excessive alcohol consumption, and recreational drugs. These substances can negatively affect fertility and increase the risk of miscarriage.

5. Manage Stress

Chronic stress can impact fertility and overall health. Practice stress management techniques such as mindfulness, yoga, meditation, and deep breathing exercises.

6. Regular Medical Checkups

Regular checkups with your healthcare provider ensure that any underlying health issues are addressed. Discuss your plans to conceive and follow any specific advice given by your doctor.

7. Monitor Ovulation

Understanding your ovulation cycle can help increase your chances of conception. Use ovulation predictor kits, monitor basal body temperature, or track cervical mucus changes to identify your most fertile days.

Seeking Medical Advice

If you have experienced multiple miscarriages, it’s important to seek medical advice. Recurrent miscarriages can be due to various underlying issues that may need to be addressed. Your doctor may recommend:

  1. Genetic Testing: To identify any genetic factors that may contribute to miscarriage.
  2. Hormone Testing: To check for hormonal imbalances that may affect pregnancy.
  3. Imaging Tests: Such as ultrasound or hysteroscopy to check for structural abnormalities in the uterus.
  4. Blood Tests: To check for autoimmune disorders or clotting disorders that may impact pregnancy.

Emotional Well-being

Maintaining emotional well-being is crucial during the journey of trying to conceive after a miscarriage.

1. Seek Support

Engage with support groups, online communities, or therapy to connect with others who have gone through similar experiences. Sharing your feelings and hearing from others can provide comfort and understanding.

2. Practice Self-care

Take time for self-care activities that bring you joy and relaxation. This can include hobbies, exercise, or spending time with loved ones.

3. Set Realistic Expectations

Understand that it might take time to conceive again. Setting realistic expectations can help reduce stress and anxiety during the process.

4. Stay Positive

Focus on the positive aspects of your journey. Keep a journal to document your thoughts and progress, and celebrate small milestones along the way.

Deciding when to try to conceive again after a miscarriage is a deeply personal decision that involves both physical and emotional considerations. It’s important to give yourself time to heal and to seek support from healthcare providers, support groups, and loved ones. By taking steps to prepare your body and mind for a healthy pregnancy, you can increase your chances of a positive outcome.

Remember, every couple’s journey is unique, and what works for one person may not work for another. Be patient with yourself, stay informed, and seek professional advice when needed. With time, support, and self-care, you can navigate this challenging period and move towards a healthy and successful pregnancy.