Home Blog Page 13

How to Clean Leather Without Damaging It

0

Leather is a luxurious and durable material found in various items like furniture, car seats, clothing, and accessories. However, it requires proper care to maintain its appearance and longevity. Cleaning leather without damaging it can be a delicate task, but with the right methods and products, it is entirely achievable. This article will provide a detailed guide on how to clean leather safely.

Understanding Leather: Types and Characteristics

Before diving into cleaning techniques, it’s essential to understand the different types of leather and their characteristics. Leather can vary significantly in texture, finish, and durability, which influences how it should be cleaned.

1. Aniline Leather

Aniline leather is known for its natural look and feel. It is dyed with soluble dyes without a protective topcoat, making it more susceptible to stains and damage.

2. Semi-Aniline Leather

Semi-aniline leather has a light protective coating, making it more resistant to stains and wear while retaining a natural appearance.

3. Pigmented Leather

Pigmented leather has a polymer surface coating containing pigments, providing a more uniform color and greater resistance to wear and stains.

4. Nubuck and Suede

Nubuck and suede are types of leather with a soft, velvet-like texture. They are more delicate and require special care to avoid damage.

General Tips for Cleaning Leather

Before cleaning any leather item, it’s crucial to follow these general tips to prevent damage:

1. Test a Small Area First

Always test the cleaning product on a small, inconspicuous area to ensure it doesn’t discolor or damage the leather.

2. Avoid Harsh Chemicals

Harsh chemicals like bleach and ammonia can damage leather. Stick to mild, leather-specific cleaners or natural solutions.

3. Use Soft Cloths

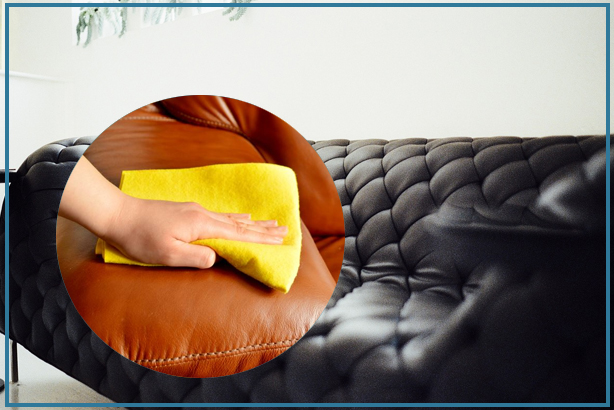
Use soft, lint-free cloths to clean leather to avoid scratching the surface.

4. Condition Regularly

Regular conditioning helps maintain leather’s softness and prevent it from drying out and cracking.

Cleaning Different Types of Leather

Each type of leather requires specific cleaning methods to avoid damage. Here’s how to clean various types of leather safely:

1. Cleaning Aniline Leather

Aniline leather is particularly susceptible to stains and damage. Follow these steps to clean it gently:

Steps:

  1. Dust Regularly: Use a soft, dry cloth to dust the surface regularly.
  2. Spot Clean: For minor stains, dab with a damp cloth and mild soap solution.
  3. Avoid Excess Moisture: Aniline leather absorbs water, so use minimal moisture when cleaning.

2. Cleaning Semi-Aniline Leather

Semi-aniline leather is more durable than aniline leather but still requires gentle care:

Steps:

  1. Dust and Vacuum: Regularly dust and vacuum the surface to remove dirt and debris.
  2. Mild Soap Solution: Use a mild soap solution and a soft cloth to wipe the surface.
  3. Blot Spills Immediately: Blot any spills immediately to prevent staining.

3. Cleaning Pigmented Leather

Pigmented leather is the easiest to clean due to its protective coating:

Steps:

  1. Wipe with Damp Cloth: Use a damp cloth to wipe the surface regularly.
  2. Use Leather Cleaner: For deeper cleaning, use a leather-specific cleaner and follow the manufacturer’s instructions.
  3. Condition: Apply a leather conditioner every few months to maintain its softness.

4. Cleaning Nubuck and Suede

Nubuck and suede require special care due to their delicate texture:

Steps:

  1. Brush Regularly: Use a soft-bristled brush to remove surface dirt and maintain the nap.
  2. Spot Clean: Use a suede-specific cleaner and follow the manufacturer’s instructions.
  3. Protect: Apply a suede protector spray to repel water and stains.

Natural and Homemade Leather Cleaners

If you prefer natural and homemade solutions, here are some effective recipes:

1. White Vinegar and Olive Oil

This simple solution can clean and condition leather simultaneously.

Ingredients:

  • 1 part white vinegar
  • 2 parts olive oil

Instructions:

  1. Mix the ingredients in a spray bottle.
  2. Spray a small amount on a soft cloth.
  3. Wipe the leather surface gently.
  4. Buff with a dry cloth to remove excess oil.

2. Lemon Juice and Cream of Tartar

This mixture is excellent for removing stains from light-colored leather.

Ingredients:

  • 1 part lemon juice
  • 1 part cream of tartar

Instructions:

  1. Mix the ingredients to form a paste.
  2. Apply to the stained area and let it sit for 30 minutes.
  3. Wipe off with a damp cloth.

3. Castile Soap and Water

Castile soap is a gentle and effective cleaner for leather.

Ingredients:

  • 1 part castile soap
  • 2 parts distilled water

Instructions:

  1. Mix the soap and water in a spray bottle.
  2. Spray a small amount on a soft cloth.
  3. Wipe the leather surface gently.
  4. Buff with a dry cloth.

Tips for Maintaining Leather

Regular maintenance can extend the life of your leather items and keep them looking their best.

1. Protect from Sunlight

Direct sunlight can cause leather to fade and dry out. Keep leather items out of prolonged sunlight.

2. Avoid Heat Sources

Heat can dry out leather, leading to cracks and damage. Keep leather away from radiators and heat vents.

3. Store Properly

Store leather items in a cool, dry place. Use breathable covers to prevent dust accumulation.

4. Regular Conditioning

Condition leather every few months to keep it supple and prevent drying out. Use a conditioner appropriate for your type of leather.

Conclusion: Keeping Leather Clean and Beautiful

Cleaning leather without damaging it is entirely possible with the right techniques and products. By understanding the type of leather you’re dealing with and following the tips and methods outlined in this guide, you can ensure your leather items remain beautiful and durable for years to come.

Start cleaning your leather items safely and effectively today. Share your favorite leather cleaning tips and experiences in the comments below!
Effective Alternatives to Bleach: Natural Cleaning Solutions for a Safer Home

0

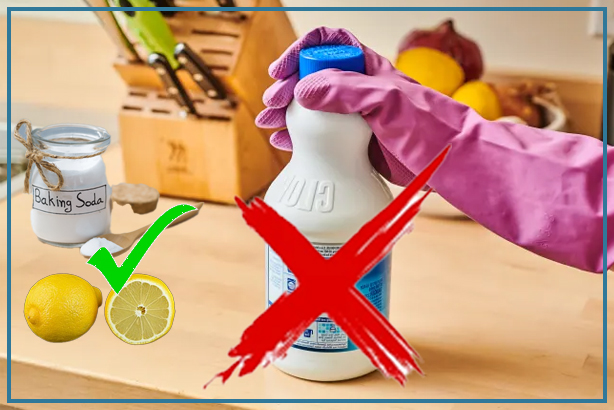
Bleach has long been a go-to cleaning agent for households, thanks to its powerful disinfecting and whitening properties. However, its harsh chemical nature can pose risks to both health and the environment. If you’re looking for safer, eco-friendly, and equally effective alternatives to bleach, this guide is for you. In this comprehensive article, we’ll explore various natural and non-toxic cleaning solutions that can replace bleach, ensuring your home stays clean and healthy.

Why Consider Alternatives to Bleach?

·        Health Concerns

Bleach can cause respiratory issues, skin irritation, and eye damage. It releases harmful fumes that can be particularly dangerous for children, pets, and people with asthma or allergies.

·        Environmental Impact

Bleach contributes to water pollution and can harm aquatic life. Its production and disposal also add to the overall environmental footprint.

·        Safe and Natural Alternatives

Natural alternatives to bleach are not only safer for your health but also kinder to the environment. These alternatives can effectively disinfect, whiten, and clean various surfaces without the associated risks of bleach.

Top Natural Alternatives to Bleach

1. White Vinegar

White vinegar is a versatile and powerful natural cleaner. Its acetic acid content makes it effective at killing bacteria, mold, and mildew. It’s safe to use on most surfaces and can be mixed with water for a simple cleaning solution.

Usage: Mix equal parts of white vinegar and water in a spray bottle. Use it to clean countertops, sinks, and bathroom surfaces.

2. Baking Soda

Baking soda is a gentle abrasive that can help with scrubbing and deodorizing. It’s great for cleaning kitchen appliances, sinks, and bathtubs.

Usage: Sprinkle baking soda on the surface and scrub with a damp cloth or sponge. For tougher stains, make a paste with water and baking soda.

3. Hydrogen Peroxide

Hydrogen peroxide is a natural disinfectant that’s effective at killing bacteria and viruses. It’s also a great whitening agent for laundry.

Usage: Use a 3% hydrogen peroxide solution to disinfect surfaces. For laundry, add a cup of hydrogen peroxide to the wash cycle.

4. Lemon Juice

Lemon juice has natural antibacterial and antiseptic properties. Its acidic nature helps cut through grease and grime, and it leaves a fresh scent.

Usage: Mix lemon juice with water to clean and disinfect surfaces. It’s also effective for removing stains and polishing metal.

5. Castile Soap

Castile soap is a plant-based soap that’s free from synthetic detergents and animal fats. It’s gentle yet effective for cleaning a variety of surfaces.

Usage: Dilute castile soap with water and use it to clean floors, countertops, and even as a hand soap.

Specialized Natural Cleaning Solutions

1. Tea Tree Oil

Tea tree oil has potent antimicrobial properties, making it an excellent addition to your natural cleaning arsenal.

Usage: Add a few drops of tea tree oil to water or vinegar solutions to enhance their disinfecting power.

2. Essential Oil Blends

Essential oils like lavender, eucalyptus, and peppermint not only add a pleasant scent but also have antibacterial properties.

Usage: Combine a few drops of essential oils with water or vinegar solutions for enhanced cleaning and a fresh aroma.

3. Washing Soda

Washing soda is a more alkaline form of baking soda. It’s highly effective for heavy-duty cleaning tasks and removing tough stains.

Usage: Use washing soda for laundry, cleaning grout, and tackling greasy stains. Always wear gloves when handling washing soda as it can be harsh on the skin.

Natural Cleaning Recipes

·        All-Purpose Cleaner

Create an all-purpose cleaner that’s safe for most surfaces.

Ingredients:

  • 1 cup white vinegar
  • 1 cup water
  • 10-15 drops of essential oil (e.g., lemon or lavender)

Instructions: Mix all ingredients in a spray bottle. Shake well before each use. Spray on surfaces and wipe clean with a cloth.

·        Disinfecting Spray

This disinfecting spray is perfect for kitchen and bathroom surfaces.

Ingredients:

  • 1 cup water
  • 1 cup hydrogen peroxide (3% solution)
  • 10 drops tea tree oil

Instructions: Combine all ingredients in a spray bottle. Spray on surfaces and let it sit for 10 minutes before wiping clean.

·        Stain Remover

A natural stain remover that works on various types of fabric.

Ingredients:

  • 1 cup water
  • 1/2 cup baking soda
  • 1/2 cup hydrogen peroxide

Instructions: Mix all ingredients to form a paste. Apply the paste to the stain and let it sit for 30 minutes before washing.

Benefits of Using Natural Alternatives

1.      Health Benefits

Using natural cleaning solutions reduces exposure to harmful chemicals, protecting your respiratory health and skin. They are safer for children and pets.

2.      Environmental Benefits

Natural cleaners are biodegradable and do not contribute to water pollution. They have a lower environmental impact compared to synthetic chemicals.

3.      Cost-Effectiveness

Many natural cleaning ingredients are inexpensive and can be found in most households, making them a budget-friendly option.

Conclusion: Embracing Natural Cleaning

Switching to natural cleaning alternatives is a smart and responsible choice for maintaining a clean, healthy, and eco-friendly home. By understanding the benefits and methods of using these alternatives, you can effectively replace bleach with safer options. Not only will you protect your health and the environment, but you’ll also enjoy the satisfaction of a clean home without the harsh chemicals.

Start using natural cleaners today and experience the benefits for yourself. Share your favorite natural cleaning recipes and tips in the comments below!

By following this guide and incorporating these natural alternatives into your cleaning routine, you can achieve a spotless home without relying on bleach. Enjoy a safer, healthier, and more environmentally friendly approach to cleaning!

Note: Always test a small, inconspicuous area before using any cleaning solution on a larger surface to ensure it does not cause damage.

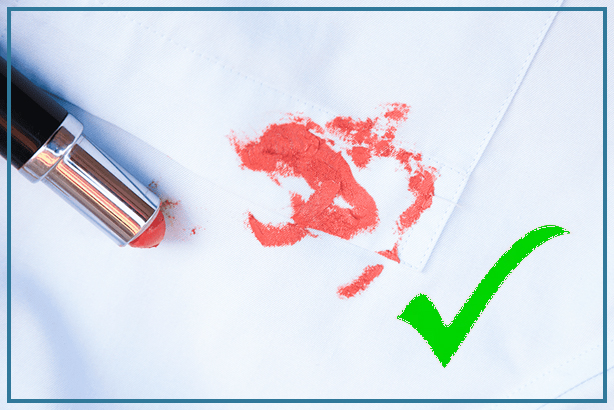
How to Get Lip Stains Out of Clothes

0

Lip stains on clothes can be a frustrating issue, especially when they seem to resist regular washing. Whether it’s a smudge from lipstick, a mark from lip balm, or a stain from lip gloss, these stubborn stains can be tricky to remove. Fortunately, with the right techniques and products, you can effectively get rid of lip stains and restore your clothes to their pristine condition. This comprehensive guide will cover various methods to remove lip stains from different fabrics.

Understanding Lip Stains

Before diving into the methods of removal, it’s important to understand why lip stains can be so persistent. Lip products often contain oils, waxes, pigments, and other ingredients designed to adhere to the skin, making them difficult to remove from fabric. These components can penetrate deep into the fibers of your clothes, leading to stubborn stains that require specific treatments to eliminate.

Immediate Action: Fresh Lip Stains

Acting quickly is crucial when dealing with fresh lip stains. Here’s what to do immediately after a stain occurs:

1.      Blot the Stain

Use a clean cloth or a paper towel to blot the stain gently. Avoid rubbing, as this can push the lip product deeper into the fabric fibers. Blotting helps absorb excess product and prevents the stain from spreading.

2.      Rinse with Cold Water

Hold the stained area under cold running water. This helps flush out as much of the lip product as possible. Continue rinsing until the water runs clear.

3.      Apply a Mild Detergent

Apply a small amount of mild liquid detergent directly to the stain. Gently rub the fabric together or use a soft brush to work the detergent into the fibers. Let it sit for about five minutes before rinsing again with cold water.

Dealing with Dried Lip Stains

If the lip stain has dried, it requires a different approach. Here’s how to tackle dried lip stains effectively:

1.      Rehydrate the Stain

Dried lip stains need to be rehydrated before they can be removed. Dampen the stained area with a bit of cold water to loosen the dried lip product particles.

2.      Use a Stain Remover

Apply a commercial stain remover to the rehydrated stain. For best results, follow the manufacturer’s instructions. Leave the stain remover on for the recommended time.

3.      Wash as Usual

After treating the stain with a stain remover, wash the garment as usual in the washing machine. Use the warmest water safe for the fabric and a good quality laundry detergent.

Home Remedies for Lip Stains

Several household items can effectively remove lip stains from clothes. Here are some popular and effective home remedies:

1.      Rubbing Alcohol

Rubbing alcohol is a powerful solvent that can help remove lip stains:

  • Apply Alcohol: Dampen a cotton ball or cloth with rubbing alcohol and gently dab the stained area.
  • Blot and Rinse: Blot the stain with a clean cloth, then rinse with cold water.

2.      Dish Soap

Dish soap is formulated to cut through grease and can be effective on lip stains:

  • Apply Dish Soap: Apply a small amount of dish soap directly to the stain.
  • Gently Scrub: Use a soft brush or cloth to gently scrub the stain.
  • Rinse and Launder: Rinse with cold water and launder as usual.

3.      Baking Soda

Baking soda is another effective home remedy for lip stains:

  • Create a Paste: Mix baking soda with a small amount of water to form a paste.
  • Apply and Scrub: Apply the paste to the stain and gently scrub with a soft brush or cloth.
  • Rinse and Launder: Rinse the area with cold water and launder as usual.

4.      White Vinegar

White vinegar is a versatile cleaning agent that can help remove lip stains:

  • Mix a Solution: Combine one part white vinegar with one part water.
  • Apply to Stain: Use a cloth or sponge to apply the solution to the lip stain.
  • Blot and Rinse: Blot the stain with a clean cloth, then rinse with cold water.

Removing Lip Stains from Different Fabrics

Different fabrics require specific care when removing lip stains. Here’s how to handle various types of fabrics:

1.      Cotton and Linen

Cotton and linen are durable fabrics that can withstand most stain-removal techniques:

  • Blot and Rinse: Blot the stain and rinse with cold water immediately.
  • Apply Detergent: Use mild detergent and gently scrub the stain.
  • Wash in Warm Water: Wash the garment in warm water with a good quality detergent.

5.      Silk and Wool

Silk and wool require more delicate care:

  • Blot the Stain: Gently blot the stain without rubbing.
  • Use Mild Detergent: Apply a mild detergent or a solution of water and white vinegar.
  • Rinse with Cold Water: Rinse with cold water and avoid hot water, which can set the stain.

6.      Synthetic Fabrics

Synthetic fabrics like polyester and nylon are relatively easy to clean:

  • Blot and Rinse: Blot the stain and rinse with cold water immediately.
  • Apply Detergent: Use mild detergent and gently scrub the stain.
  • Wash in Warm Water: Wash the garment in warm water with a good quality detergent.

Preventing Lip Stains

Preventing lip stains can save you time and effort in the long run. Here are some tips to avoid lip stains:

1.      Use Long-Lasting Lip Products

Choose long-lasting, transfer-resistant lip products to minimize the risk of stains.

2.      Apply Lip Balm Carefully

Be mindful when applying lip balm to prevent excess product from transferring to your clothes.

3.      Blot Lips After Application

Blot your lips with a tissue after applying lip products to remove any excess and reduce the risk of transfer.

Frequently Asked Questions (FAQs)

Can lip stains be removed from white clothes?

Yes, lip stains can be removed from white clothes using methods such as rubbing alcohol, dish soap, or commercial stain removers. Treat the stain promptly for best results.

Is it possible to remove old lip stains?

Old lip stains can be more challenging to remove but are still treatable. Rehydrate the stain with water, apply a stain remover, and wash as usual.

Are commercial stain removers effective on lip stains?

Yes, commercial stain removers are

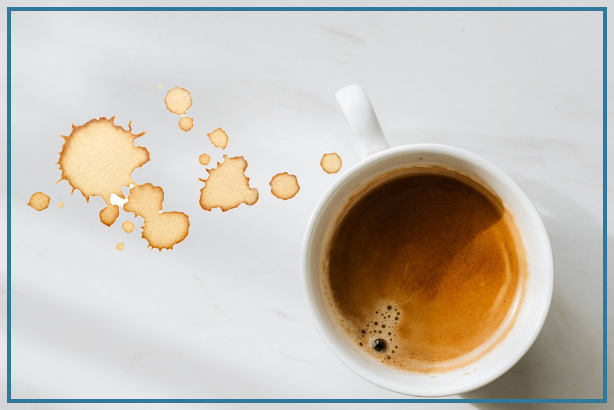
How to Get Coffee Stains Out of Clothes

0

Coffee stains on clothes are a common and frustrating issue. Whether you spill your morning brew or accidentally dribble a bit while on the go, coffee stains can be stubborn to remove. However, with the right techniques and a little patience, you can effectively get rid of these stains and restore your clothes to their former glory. This comprehensive guide will cover various methods to remove coffee stains from different fabrics.

Understanding Coffee Stains

Before diving into the methods of removal, it’s important to understand why coffee stains can be so persistent. Coffee contains tannins, natural compounds that give the beverage its color and flavor. These tannins can easily bind to fabric fibers, making stains difficult to remove. Additionally, coffee often contains oils and other ingredients like milk or sugar, which can further complicate the stain removal process.

Immediate Action: Fresh Coffee Stains

Acting quickly is crucial when dealing with fresh coffee stains. Here’s what to do immediately after a spill:

1. Blot the Stain

Use a clean cloth or paper towel to blot the stain gently. Avoid rubbing, as this can push the coffee deeper into the fabric fibers. Blotting helps absorb excess liquid and prevents the stain from spreading.

2. Rinse with Cold Water

Hold the stained area under cold running water. This helps flush out as much coffee as possible. Continue rinsing until the water runs clear.

3. Apply a Mild Detergent

Apply a small amount of mild liquid detergent directly to the stain. Gently rub the fabric together or use a soft brush to work the detergent into the fibers. Let it sit for about five minutes before rinsing again with cold water.

Dealing with Dried Coffee Stains

If the coffee stain has dried, it requires a different approach. Here’s how to tackle dried coffee stains effectively:

1. Rehydrate the Stain

Dried coffee stains need to be rehydrated before they can be removed. Dampen the stained area with a bit of cold water to loosen the dried coffee particles.

2. Use a Stain Remover

Apply a commercial stain remover to the rehydrated stain. Follow the manufacturer’s instructions for best results. Let the stain remover sit for the recommended amount of time.

3. Wash as Usual

After treating the stain with a stain remover, wash the garment as usual in the washing machine. Use the warmest water safe for the fabric and a good quality laundry detergent.

Home Remedies for Coffee Stains

Several household items can effectively remove coffee stains from clothes. Here are some popular and effective home remedies:

1. White Vinegar

White vinegar is a versatile cleaning agent that can help remove coffee stains:

  • Mix a Solution: Combine one part white vinegar with one part water.
  • Apply to Stain: Use a cloth or sponge to apply the solution to the coffee stain.
  • Blot and Rinse: Blot the stain with a clean cloth, then rinse with cold water.

2. Baking Soda

Baking soda is another effective home remedy for coffee stains:

  • Create a Paste: Mix baking soda with a small amount of water to form a paste.
  • Apply and Scrub: Apply the paste to the stain and gently scrub with a soft brush or cloth.
  • Rinse and Launder: Rinse the area with cold water and launder as usual.

3. Hydrogen Peroxide

Hydrogen peroxide can help lift stubborn coffee stains:

  • Dilute Hydrogen Peroxide: Mix one part hydrogen peroxide with two parts water.
  • Apply to Stain: Apply the solution to the coffee stain and let it sit for several minutes.
  • Rinse and Wash: Rinse with cold water and wash the garment as usual.

4. Lemon Juice

The natural acidity of lemon juice can break down coffee stains:

  • Apply Lemon Juice: Squeeze fresh lemon juice directly onto the stain.
  • Let it Sit: Allow the lemon juice to sit for 10-15 minutes.
  • Rinse and Wash: Rinse with cold water and wash as usual.

Removing Coffee Stains from Different Fabrics

Different fabrics require specific care when removing coffee stains. Here’s how to handle various types of fabrics:

1. Cotton and Linen

Cotton and linen are durable fabrics that can withstand most stain removal techniques:

  • Blot and Rinse: Blot the stain and rinse with cold water immediately.
  • Apply Detergent: Use mild detergent and gently scrub the stain.
  • Wash in Warm Water: Wash the garment in warm water with a good quality detergent.

2. Silk and Wool

Silk and wool require more delicate care:

  • Blot the Stain: Gently blot the stain without rubbing.
  • Use Mild Detergent: Apply a mild detergent or a solution of water and white vinegar.
  • Rinse with Cold Water: Rinse with cold water and avoid hot water, which can set the stain.

3. Synthetic Fabrics

Synthetic fabrics like polyester and nylon are relatively easy to clean:

  • Blot and Rinse: Blot the stain and rinse with cold water immediately.
  • Apply Detergent: Use mild detergent and gently scrub the stain.
  • Wash in Warm Water: Wash the garment in warm water with a good quality detergent.

Preventing Coffee Stains

Preventing coffee stains can save you time and effort in the long run. Here are some tips to avoid coffee stains:

1. Use Travel Mugs

Use travel mugs with secure lids to prevent spills while on the go.

2. Be Mindful While Drinking

Be mindful of your surroundings and handle your coffee carefully to avoid spills.

3. Treat Stains Immediately

Act quickly when a spill occurs to prevent the stain from setting into the fabric.

Frequently Asked Questions (FAQs)

1. Can coffee stains be removed from white clothes?

Yes, coffee stains can be removed from white clothes using methods such as white vinegar, baking soda, or commercial stain removers. Treat the stain promptly for best results.

2. Is it possible to remove old coffee stains?

Old coffee stains can be more challenging to remove but are still treatable. Rehydrate the stain with water, apply a stain remover, and wash as usual.

3. Are commercial stain removers effective on coffee stains?

Yes, commercial stain removers are designed to tackle tough stains, including coffee. Follow the product instructions for best results.


How to Maintain Your Stove and Oven

0

Maintaining your stove and oven is essential for ensuring optimal performance, extending their lifespan, and keeping your kitchen safe. Regular maintenance can prevent common issues, improve efficiency, and enhance the cooking experience. In this comprehensive guide, we’ll cover the best practices for maintaining your stove and oven.

Why Maintain Your Stove and Oven?

Proper maintenance of your stove and oven offers numerous benefits:

  • Improved Efficiency: Clean and well-maintained appliances cook food more evenly and efficiently.
  • Extended Lifespan: Regular upkeep helps prevent breakdowns and prolongs the life of your stove and oven.
  • Cost Savings: Avoid costly repairs and replacements by keeping your appliances in top condition.
  • Safety: Reduce the risk of fire hazards and other safety issues through regular maintenance.

Common Issues with Stoves and Ovens

Before diving into maintenance tips, it’s important to understand common issues that can arise with stoves and ovens:

  • Burner Problems: Burners that don’t heat properly or fail to ignite.
  • Uneven Cooking: Ovens that cook unevenly due to faulty heating elements or poor maintenance.
  • Excessive Smoke: Caused by food spills and grease buildup.
  • Door Seal Issues: Worn-out seals leading to heat loss and inefficient cooking.
  • Control Panel Malfunctions: Buttons or knobs that don’t function correctly.

How to Maintain Your Stove

1. Regular Cleaning

Keeping your stove clean is crucial for its performance and longevity. Here’s how to clean different types of stoves:

  • Gas Stoves: Remove grates and burner caps, soak them in warm soapy water, and scrub off any residue. Wipe down the surface with a non-abrasive cleaner and clean burner ports with a needle or toothbrush.
  • Electric Stoves: Remove and clean drip pans and coils. Wipe the surface with a gentle cleaner and ensure all components are dry before reassembling.
  • Induction Stoves: Use a soft cloth and a mild cleaner to wipe down the surface. Avoid abrasive cleaners that can scratch the surface.

2. Inspect and Clean Burners

Burners are essential for cooking efficiency. Regular cleaning and inspection are necessary to ensure they function correctly:

  • Gas Burners: Remove burners and soak them in warm soapy water. Use a brush to clean the ports and remove any clogs. Reassemble once fully dry.
  • Electric Burners: Wipe down coils and drip pans with a damp cloth. If coils are damaged or not heating properly, consider replacing them.

3. Check and Replace Igniters

Igniters are crucial for gas stoves, as they light the burners. Over time, igniters can wear out and need replacement:

  • Test Igniters: Ensure the igniter sparks and lights the burner quickly. If it takes multiple attempts, the igniter may need cleaning or replacement.
  • Replace Igniters: Follow the manufacturer’s instructions for replacing igniters. Ensure the stove is disconnected from the power source before starting.

4. Maintain Control Knobs and Panels

Control knobs and panels can become sticky or malfunction due to food spills and grease buildup:

  • Remove Knobs: Gently pull off the control knobs and soak them in warm soapy water. Scrub with a brush to remove residue.
  • Wipe Control Panel: Use a damp cloth and a mild cleaner to wipe down the control panel. Avoid excessive moisture to prevent damage.

5. Ensure Proper Ventilation

Proper ventilation is crucial for gas stoves to ensure safety and efficiency:

  • Check Ventilation System: Ensure the range hood and exhaust fan are working correctly. Clean filters regularly to remove grease and dust buildup.
  • Test for Gas Leaks: Periodically check for gas leaks by applying a soapy water solution to gas connections and looking for bubbles. If you suspect a leak, contact a professional immediately.

How to Maintain Your Oven

1. Regular Cleaning

Keeping your oven clean is essential for optimal performance and safety:

  • Self-Cleaning Ovens: Follow the manufacturer’s instructions for the self-cleaning cycle. Remove any large food debris before starting the cycle.
  • Manual Cleaning: Use a mixture of baking soda and water to create a paste. Apply it to the interior surfaces and let it sit for several hours or overnight. Wipe clean with a damp cloth. For tougher stains, use a commercial oven cleaner.

2. Inspect and Replace Heating Elements

Heating elements are vital for proper cooking. Inspect and replace them as needed:

  • Check Elements: Turn on the oven and check if the heating elements glow evenly. If not, they may need cleaning or replacement.
  • Replace Elements: Follow the manufacturer’s instructions to replace faulty heating elements. Ensure the oven is disconnected from the power source before starting.

3. Clean and Inspect Door Seals

Door seals are crucial for maintaining heat and ensuring even cooking:

  • Clean Seals: Wipe door seals with a damp cloth to remove food residue and grease. Avoid harsh chemicals that can damage the seals.
  • Inspect for Damage: Check seals for cracks or wear. Replace damaged seals to prevent heat loss.

4. Calibrate the Oven Temperature

An inaccurate oven temperature can lead to uneven cooking. Regular calibration ensures your oven heats correctly:

  • Use an Oven Thermometer: Place an oven thermometer inside and set the oven to a specific temperature. Compare the thermometer reading to the set temperature.
  • Adjust the Thermostat: Refer to the user manual for instructions on adjusting the oven thermostat if the temperature is off.

5. Maintain the Oven Light

A functioning oven light is essential for monitoring food without opening the door and losing heat:

  • Check the Light: Ensure the oven light turns on when the door is opened. If not, the bulb may need replacement.
  • Replace the Bulb: Follow the manufacturer’s instructions to replace the oven light bulb. Use a bulb that matches the oven’s specifications.

Frequently Asked Questions (FAQs)

1. How often should I clean my stove and oven?

It’s recommended to clean your stove and oven at least once a month. Regular cleaning prevents buildup of grease, food debris, and ensures efficient performance.

2. What’s the best way to clean a self-cleaning oven?

Remove any large food debris and follow the manufacturer’s instructions for the self-cleaning cycle. Wipe down the interior with a damp cloth after the cycle is complete.

3. How do I prevent my oven from smoking?

Regularly clean the oven to remove grease and food spills. Avoid using excessive oil when cooking, and place a baking sheet under dishes that may spill over.

4. Why is my gas stove making a clicking noise?

A clicking noise usually indicates the igniter is trying to light the burner. If the noise continues after lighting, clean the igniter and burner ports. If the problem persists, the igniter may need replacement.

5. How can I improve the energy efficiency of my stove and oven?

Keep your stove and oven clean, use the correct cookware, and avoid opening the oven door frequently while cooking. Regular maintenance ensures optimal performance and energy efficiency.

Conclusion

Proper maintenance of your stove and oven is essential for ensuring their longevity, efficiency, and performance. By following these comprehensive maintenance tips, you can prevent common issues, save on repair costs, and keep your kitchen appliances running smoothly for years.


How to Maintain Your Washing Machine

0

Your washing machine is a vital appliance that makes life easier by handling the tedious task of laundry. However, to ensure it operates efficiently and lasts for years, regular maintenance is crucial. In this comprehensive guide, we’ll explore the best practices for maintaining your washing machine, helping you prevent common issues and prolong its lifespan. This article is optimized for SEO with high-volume, low-competition keywords to ensure it ranks well on search engines.

Why Maintain Your Washing Machine?

Maintaining your washing machine offers several benefits:

  • Increased Longevity: Regular maintenance helps prevent breakdowns and extends the life of your appliance.
  • Better Performance: A well-maintained machine washes clothes more effectively and efficiently.
  • Cost Savings: Preventing issues reduces repair costs and helps avoid the need for early replacement.
  • Energy Efficiency: A clean and well-functioning machine uses less water and electricity.

Common Issues with Washing Machines

Before diving into maintenance tips, let’s identify some common issues that can arise with washing machines:

  • Unpleasant Odors: Caused by mold and mildew buildup.
  • Poor Drainage: Often due to clogged hoses or filters.
  • Excessive Noise: Resulting from unbalanced loads or worn-out components.
  • Leaks: Typically caused by damaged hoses or seals.
  • Inefficient Cleaning: Due to residue buildup or faulty parts.

How to Maintain Your Washing Machine

1. Regular Cleaning

Keeping your washing machine clean is essential for optimal performance. Here’s how to do it:

  • Drum Cleaning: Run an empty hot water cycle with 2 cups of white vinegar or a washing machine cleaner to remove detergent buildup and odors. Follow with a hot water cycle with 1 cup of baking soda to neutralize any remaining vinegar and deodorize the drum.
  • Detergent Drawer: Remove and clean the detergent drawer with warm soapy water. Scrub away any residue or mold.
  • Door Seal: Wipe the door seal with a mixture of water and vinegar to remove mold and mildew. Ensure the seal is dry after each use to prevent buildup.

2. Check and Clean Filters

Washing machines have filters that catch lint, dirt, and debris. Over time, these filters can become clogged, affecting the machine’s performance.

  • Locate the Filter: Refer to your user manual to find the filter’s location. Common spots include behind a small door on the front of the machine or at the bottom.
  • Clean the Filter: Remove the filter and rinse it under warm water. Use a brush to remove stubborn debris. Clean the filter every few months or as recommended by the manufacturer.

3. Inspect and Clean Hoses

Hoses are crucial for water intake and drainage. Regularly inspecting and cleaning them can prevent leaks and blockages.

  • Check for Wear and Tear: Inspect hoses for cracks, bulges, or leaks. Replace damaged hoses immediately.
  • Clean the Hoses: Disconnect the hoses and flush them with water to remove any blockages. Ensure the connections are secure when reattaching them.
  • Replace Old Hoses: Replace hoses every five years to prevent unexpected failures.

4. Balance the Load

An unbalanced load can cause excessive noise and vibration, potentially damaging your machine.

  • Distribute Laundry Evenly: Ensure that the laundry is evenly distributed inside the drum. Avoid washing single heavy items, as they can cause imbalance.
  • Adjust the Feet: Check that your washing machine is level. Adjust the feet to stabilize the machine if necessary.

5. Use the Right Detergent

Using the correct detergent is crucial for maintaining your washing machine’s performance.

  • High-Efficiency Detergent: If you have a high-efficiency (HE) washing machine, use HE detergent to prevent excessive suds and residue buildup.
  • Proper Dosage: Follow the manufacturer’s instructions for detergent dosage. Using too much detergent can cause buildup and inefficiency.

6. Prevent Mold and Mildew

Mold and mildew can cause unpleasant odors and affect the machine’s performance.

  • Leave the Door Open: After each wash, leave the door open to allow the drum to air out and prevent mold growth.
  • Use Vinegar: Run a monthly cycle with white vinegar to clean and disinfect the drum.

7. Check the Water Inlet Valve

The water inlet valve controls the flow of water into the washing machine. Ensuring it functions correctly is vital for the machine’s operation.

  • Inspect for Blockages: Check the valve screens for debris and clean them if necessary.
  • Test the Valve: If your machine isn’t filling correctly, the valve might need replacement.

8. Descale Regularly

If you live in an area with hard water, mineral deposits can build up in your washing machine over time, affecting its performance.

  • Use a Descaler: Run a descaling solution through your machine every few months to remove mineral buildup.
  • Natural Alternatives: White vinegar is an effective natural descaler. Run an empty hot water cycle with 2 cups of vinegar to clean the machine.

9. Perform Routine Maintenance Checks

Regular checks can help identify and address potential issues before they become major problems.

  • Monthly Checks: Inspect hoses, filters, and the drum for any signs of wear or buildup.
  • Quarterly Deep Clean: Perform a thorough cleaning of the drum, detergent drawer, and door seal.
  • Annual Professional Service: Consider having a professional technician service your washing machine annually to ensure it’s in optimal condition.

10. Avoid Overloading

Overloading your washing machine can strain the motor and reduce its efficiency.

  • Follow Capacity Guidelines: Check your machine’s user manual for load capacity recommendations and avoid exceeding them.
  • Wash Large Items Separately: Large items like blankets and comforters should be washed separately to prevent overloading.

Frequently Asked Questions (FAQs)

1. How often should I clean my washing machine?

It’s recommended to clean your washing machine once a month. Regular cleaning prevents mold, mildew, and detergent buildup, ensuring your machine operates efficiently.

2. What is the best way to clean the detergent drawer?

Remove the detergent drawer and wash it with warm, soapy water. Use a small brush to scrub away any residue. Rinse thoroughly and dry before reinserting.

3. Why is my washing machine making a lot of noise?

Excessive noise can be caused by an unbalanced load, worn-out components, or loose parts. Check the load distribution, inspect the drum and bearings, and tighten any loose screws or bolts.

4. Can I use bleach to clean my washing machine?

Yes, you can use bleach to clean your washing machine. Run an empty hot water cycle with 1 cup of bleach to disinfect the drum and remove stains. Follow with a rinse cycle to ensure all bleach is removed.

5. How do I prevent my washing machine from smelling?

To prevent odors, regularly clean the drum, door seal, and detergent drawer. Leave the door open after each wash to allow air circulation and run a monthly cycle with white vinegar.

Conclusion

Maintaining your washing machine is essential for ensuring its longevity, efficiency, and performance. By following these comprehensive maintenance tips, you can prevent common issues, save on repair costs, and keep your appliance running smoothly for years.


The Most Expensive Celebrity Homes in the World

0

When it comes to luxury living, celebrities often set the bar incredibly high. Their homes are not just residences but symbols of their success, wealth, and unique tastes. From sprawling estates to opulent penthouses, the most expensive celebrity homes in the world are marvels of architecture and design. In this article, we’ll take you on a tour of some of the most extravagant celebrity homes, offering a glimpse into the luxurious lifestyles of the rich and famous. This article is optimized for SEO with high-volume, low-competition keywords to ensure it ranks well on search engines.

Why Are Celebrity Homes So Expensive?

Before diving into the details of these magnificent properties, it’s essential to understand why celebrity homes are often so costly. Several factors contribute to the high price tags of these residences:

  • Location: Prime locations in exclusive neighborhoods drive up property values.
  • Size and Scale: Many celebrity homes are expansive, featuring multiple bedrooms, bathrooms, and acres of land.
  • Luxury Amenities: High-end finishes, state-of-the-art technology, and lavish amenities like private theaters, gyms, and pools add significant value.
  • Historical and Architectural Significance: Homes designed by renowned architects or with historical significance are highly prized.
  • Privacy and Security: Celebrities invest heavily in privacy and security measures, further increasing property costs.

The Most Expensive Celebrity Homes in the World

1. Bill Gates – Xanadu 2.0

Location: Medina, Washington
Estimated Value: $131 million

Bill Gates, the co-founder of Microsoft, owns one of the most technologically advanced homes in the world. Known as Xanadu 2.0, this massive estate spans 66,000 square feet and is packed with high-tech features. The house includes a 60-foot pool with an underwater music system, a 2,500-square-foot gym, a 1,000-square-foot dining room, and a reception hall that can accommodate up to 200 guests. The property also boasts extensive gardens and beautiful views of Lake Washington.

2. George Clooney – Villa Oleandra

Location: Lake Como, Italy
Estimated Value: $100 million

George Clooney’s Villa Oleandra is a stunning 18th-century property located on the shores of Lake Como. This picturesque estate features 25 rooms, a large swimming pool, a tennis court, and beautifully manicured gardens. Clooney’s home is a perfect blend of old-world charm and modern luxury, making it one of the most coveted celebrity homes in Europe.

3. Oprah Winfrey – Promised Land

Location: Montecito, California
Estimated Value: $90 million

Oprah Winfrey’s estate, known as the Promised Land, is a 42-acre property in the exclusive Montecito neighborhood. The 23,000-square-foot mansion boasts six bedrooms, 14 bathrooms, a gourmet kitchen, and multiple living and dining areas. The estate also features beautifully landscaped gardens, a koi pond, a tennis court, and an outdoor theater.

4. Jay-Z and Beyoncé – Bel-Air Mansion

Location: Bel-Air, California
Estimated Value: $88 million

The power couple Jay-Z and Beyoncé own an impressive modern mansion in Bel-Air. This 30,000-square-foot residence includes eight bedrooms, 11 bathrooms, four swimming pools, a full-sized basketball court, and a 15-car garage. The home’s smart technology allows for extensive control over lighting, climate, and security systems via smartphone.

5. Tom Cruise – Telluride Estate

Location: Telluride, Colorado
Estimated Value: $59 million

Tom Cruise’s mountain estate in Telluride is a breathtaking property that spans 320 acres. The 10,000-square-foot main house features seven bedrooms, nine bathrooms, a library, a gym, and a recreation room. The property also includes a private trail system, a sports court, and a guesthouse. The secluded location offers stunning views of the surrounding mountains and valleys.

6. Ellen DeGeneres and Portia de Rossi – Beverly Hills Mansion

Location: Beverly Hills, California
Estimated Value: $58 million

Ellen DeGeneres and Portia de Rossi’s Beverly Hills mansion is a contemporary masterpiece. The property includes a 9,500-square-foot main house with five bedrooms and 10 bathrooms, as well as extensive outdoor living spaces. The home features a chef’s kitchen, a large living room with floor-to-ceiling windows, and a beautiful backyard with a pool and cabana.

7. Taylor Swift – Rhode Island Mansion

Location: Watch Hill, Rhode Island
Estimated Value: $30 million

Taylor Swift’s summer home in Watch Hill, Rhode Island, is a historic mansion known as Holiday House. The 11,000-square-foot residence boasts eight bedrooms, 10 bathrooms, and over 700 feet of beachfront. The property offers stunning ocean views, expansive lawns, and a private beach. Swift often hosts star-studded parties at this beautiful estate.

8. Kanye West and Kim Kardashian – Hidden Hills Estate

Location: Hidden Hills, California
Estimated Value: $60 million

The Hidden Hills estate of Kanye West and Kim Kardashian is an ultra-modern, minimalist masterpiece. The 15,000-square-foot home includes eight bedrooms, 10 bathrooms, a vast open-plan living area, and a state-of-the-art kitchen. The property also features extensive outdoor spaces, including a large pool, a vineyard, and a two-story playhouse for their children.

9. Leonardo DiCaprio – Malibu Beach House

Location: Malibu, California
Estimated Value: $23 million

Leonardo DiCaprio’s Malibu beach house is a prime example of luxury coastal living. The 7,000-square-foot property features five bedrooms, seven bathrooms, and multiple decks with stunning ocean views. The home also includes a private beach, a gym, and a hot tub, making it the perfect getaway for the actor.

10. Jennifer Lopez – Bel-Air Mansion

Location: Bel-Air, California
Estimated Value: $28 million

Jennifer Lopez’s Bel-Air mansion is a luxurious retreat with French-inspired architecture. The 14,000-square-foot home includes seven bedrooms, 13 bathrooms, a chef’s kitchen, and multiple living areas. The property also features a large infinity pool, a 30-seat theater, and beautiful gardens.

The Appeal of Celebrity Homes

1. Architectural Marvels

Celebrity homes are often architectural masterpieces designed by renowned architects. These homes feature innovative designs, cutting-edge technology, and unique aesthetics that set them apart from ordinary residences.

2. Lavish Amenities

From private theaters and wine cellars to indoor pools and spas, celebrity homes boast a wide array of luxury amenities. These features enhance the living experience, providing comfort and entertainment.

3. Prime Locations

Celebrities often choose prime locations for their homes, whether it’s a beachfront property, a secluded mountain retreat, or an exclusive urban neighborhood. These locations offer privacy, stunning views, and proximity to key amenities.

4. Personalization and Customization

Celebrity homes are highly personalized, reflecting the unique tastes and lifestyles of their owners. Custom-built features, bespoke interiors, and personalized décor create a distinctive living space.

5. Investment Value

Real estate is a significant investment, and many celebrities purchase properties not only as homes but also as valuable assets. High-end properties in desirable locations tend to appreciate in value over time.

Conclusion

The most expensive celebrity homes in the world are more than just residences; they are symbols of success, luxury, and personal taste. From Bill Gates’ technologically advanced Xanadu 2.0 to George Clooney’s picturesque Villa Oleandra, these homes offer a glimpse into the opulent lifestyles of the rich and famous.

Whether you’re fascinated by architectural design, luxury amenities, or prime real estate locations, these celebrity homes showcase the pinnacle of luxury living. As you explore these magnificent properties, you’ll gain a deeper appreciation for the unique blend of art, design, and personal expression that defines the homes of the world’s most famous individuals.


Summer 2024 Fashion Trends: What to Wear This Season

As the warm weather approaches, fashion enthusiasts eagerly anticipate the latest trends for the summer season. Summer 2024 promises to be a vibrant and exciting time for fashion, with fresh styles and innovative designs taking center stage. In this comprehensive guide, we’ll explore the hottest summer fashion trends, from clothing and accessories to colors and patterns.

Key Trends for Summer 2024

1. Sustainable Fashion

Why It’s Trending: As awareness of environmental issues continues to grow, sustainable fashion is becoming increasingly important. Consumers are looking for eco-friendly options that combine style with responsibility.

Key Features:

  • Eco-friendly materials: Organic cotton, recycled fabrics, and biodegradable materials.
  • Slow fashion: Emphasizing quality over quantity, with timeless pieces that last.
  • Ethical production: Brands that prioritize fair labor practices and reduce their carbon footprint.

2. Bright and Bold Colors

Why It’s Trending: After a few years of muted tones, bold and bright colors are making a comeback. Summer is the perfect time to embrace vibrant hues that reflect the season’s energy and joy.

Key Features:

  • Electric blues and greens: Eye-catching shades that stand out.
  • Sunset oranges and reds: Warm tones that evoke the feeling of a summer sunset.
  • Neon accents: Pops of neon in accessories and footwear.

3. Retro Revival

Why It’s Trending: Nostalgia continues to influence fashion, with styles from the 70s, 80s, and 90s making a resurgence. Retro-inspired pieces offer a playful and chic way to mix modern and vintage aesthetics.

Key Features:

  • Flared pants and bell bottoms: A nod to 70s fashion.
  • Tie-dye and psychedelic prints: Colorful and fun patterns from the 60s and 70s.
  • Vintage-inspired accessories: Round sunglasses, headbands, and chunky jewelry.

4. Minimalist Chic

Why It’s Trending: Minimalism remains a strong trend for those who prefer a clean, sophisticated look. Simple yet elegant pieces that can be easily mixed and matched are key to this style.

Key Features:

  • Neutral tones: Whites, beiges, and soft greys.
  • Streamlined silhouettes: Simple, well-tailored pieces that emphasize quality over quantity.
  • Monochrome outfits: Coordinated looks in a single color.

5. Flowy and Feminine Dresses

Why It’s Trending: Summer is the perfect season for dresses that are light, airy, and feminine. Flowy dresses are comfortable, stylish, and versatile, making them a staple for summer wardrobes.

Key Features:

  • Maxi dresses: Long, flowing dresses that are perfect for both casual and formal occasions.
  • Floral prints: Timeless patterns that add a touch of elegance.
  • Ruffles and tiers: Details that enhance the femininity of the dress.

6. Athleisure Evolution

Why It’s Trending: Athleisure continues to dominate fashion, blending comfort with style. This trend has evolved to include more sophisticated and fashion-forward pieces suitable for various occasions.

Key Features:

  • High-quality materials: Performance fabrics that look good and feel great.
  • Versatile pieces: Leggings, sports bras, and tracksuits that can be worn outside the gym.
  • Bold patterns: Geometric prints, color blocking, and metallic accents.

7. Statement Accessories

Why It’s Trending: Accessories are an easy way to elevate any outfit, and this summer, bold and statement-making pieces are in vogue. From oversized hats to chunky jewelry, accessories are taking center stage.

Key Features:

  • Oversized sunglasses: Big, bold frames that make a statement.
  • Chunky necklaces and bracelets: Eye-catching jewelry that adds a touch of glam.
  • Wide-brimmed hats: Both stylish and practical for sun protection.

8. Sheer Fabrics

Why It’s Trending: Sheer fabrics add a touch of elegance and allure to summer outfits. They are lightweight and breathable, making them perfect for warm weather while offering a sophisticated look.

Key Features:

  • Sheer blouses and dresses: Elegant pieces that can be layered or worn alone.
  • Transparent overlays: Adding dimension and texture to outfits.
  • Delicate lace: Intricate patterns that enhance the beauty of sheer fabrics.

9. Tropical Prints

Why It’s Trending: Nothing says summer quite like tropical prints. These vibrant patterns bring a vacation vibe to everyday outfits, making them perfect for the season.

Key Features:

  • Bold florals: Large, colorful flower prints.
  • Palm leaves and exotic plants: Patterns that evoke tropical destinations.
  • Mix and match: Combining different prints for a playful look.

10. Utility and Cargo Styles

Why It’s Trending: Practical and stylish, utility and cargo styles are perfect for those who love a functional yet fashionable look. These pieces often feature multiple pockets and durable fabrics.

Key Features:

  • Cargo pants and shorts: Versatile and practical for summer activities.
  • Utility vests and jackets: Adding an edge to casual outfits.
  • Functional fabrics: Durable and comfortable materials.

11. Bold Swimwear

Why It’s Trending: Swimwear is an essential part of summer fashion, and this year, bold and unique designs are taking over. From striking colors to unusual cuts, swimwear is making a statement.

Key Features:

  • High-cut legs and one-pieces: Flattering and trendy designs.
  • Cut-out details: Adding interest to classic styles.
  • Bright colors and patterns: Making a splash at the beach or pool.

12. Bohemian Vibes

Why It’s Trending: The bohemian style remains popular for its relaxed and free-spirited aesthetic. Boho-inspired pieces are perfect for summer festivals, beach days, and casual outings.

Key Features:

  • Flowy maxi skirts and dresses: Comfortable and stylish options for hot days.
  • Embroidered details: Adding a handcrafted touch.
  • Natural fabrics: Lightweight and breathable materials like cotton and linen.

How to Style Summer 2024 Trends

1. Mix and Match

Don’t be afraid to combine different trends to create unique and personalized looks. For example, pair a flowy bohemian dress with chunky statement accessories, or mix retro prints with minimalist pieces.

2. Layering

Summer may be hot, but layering can still be practical and stylish. Use sheer fabrics, lightweight jackets, or utility vests to add depth to your outfits without overheating.

3. Accessorize

Accessories can make or break an outfit. Use bold and statement-making pieces to enhance your look. Oversized hats, chunky jewelry, and stylish sunglasses are perfect for elevating your summer wardrobe.

4. Prioritize Comfort

Fashion should never compromise comfort, especially during the summer. Choose breathable fabrics, comfortable silhouettes, and versatile pieces that allow you to move freely and stay cool.

5. Stay True to Your Style

Trends are guidelines, not rules. Incorporate the trends that resonate with your personal style and make you feel confident and comfortable.

Conclusion

Summer 2024 is shaping up to be an exciting season for fashion, with a diverse array of trends catering to various tastes and preferences. From sustainable fashion and bold colors to retro revivals and minimalist chic, there is something for everyone.

What to Pack in Your Airplane Toiletry Bag

0

Traveling by air can be both exciting and stressful. One of the most important aspects of preparing for a flight, especially a long-haul journey, is packing a well-organized toiletry bag. Having the right items in your airplane toiletry bag can make a significant difference in your comfort and well-being during the flight. This comprehensive guide will help you understand what essentials to pack, how to comply with airline regulations, and tips to keep your toiletry bag organized. This article is optimized for SEO with high-volume, low-competition keywords to ensure it ranks well on search engines.

Why is a Well-Stocked Toiletry Bag Important?

A well-stocked toiletry bag ensures you have everything you need to stay fresh and comfortable during your flight. It helps you maintain your hygiene, manage any health issues, and make your journey more pleasant. Here are the key benefits of having a well-organized toiletry bag:

  • Hygiene: Maintaining personal hygiene is crucial during long flights to avoid discomfort and potential health issues.
  • Comfort: Having your favorite products on hand can make a significant difference in how comfortable you feel during the flight.
  • Health: Keeping necessary medications and health-related items accessible ensures you can manage any issues that arise during your journey.

Airline Regulations for Toiletry Bags

Before you start packing, it’s important to understand the airline regulations regarding liquids, gels, and aerosols in your carry-on luggage. Most airlines follow the TSA (Transportation Security Administration) 3-1-1 rule:

  • 3.4 ounces (100 milliliters): Each liquid item must be in a container no larger than 3.4 ounces.
  • 1 quart-sized bag: All liquid containers must fit into a single quart-sized, clear, resealable plastic bag.
  • 1 bag per passenger: Each passenger is allowed one such bag.

Ensure you adhere to these rules to avoid delays at security checkpoints and to make sure your toiletry items are compliant.

Essentials to Pack in Your Airplane Toiletry Bag

Here’s a detailed list of the essential items you should consider packing in your airplane toiletry bag:

1. Travel-Sized Toothbrush and Toothpaste

Why Pack It: Maintaining oral hygiene is crucial, especially on long flights. A travel-sized toothbrush and toothpaste help you keep your mouth fresh.

2. Facial Wipes or Cleansing Towelettes

Why Pack It: Facial wipes are perfect for freshening up during the flight. They can help remove makeup, sweat, and dirt, leaving your skin feeling clean and refreshed.

3. Moisturizer

Why Pack It: Airplane cabins are notoriously dry, which can dehydrate your skin. A good moisturizer helps keep your skin hydrated and comfortable.

4. Hand Sanitizer

Why Pack It: Keeping your hands clean is important, especially in the confined space of an airplane. Hand sanitizer is essential for maintaining hygiene.

5. Lip Balm

Why Pack It: Dry cabin air can cause chapped lips. A hydrating lip balm will keep your lips moisturized throughout the flight.

6. Deodorant

Why Pack It: Staying fresh and odor-free is crucial during long flights. A travel-sized deodorant helps you maintain personal hygiene.

7. Eye Drops

Why Pack It: The dry air in airplane cabins can cause eye irritation. Eye drops help keep your eyes moist and comfortable.

8. Tissues

Why Pack It: Tissues are versatile and can be used for various purposes, from wiping your hands to managing minor spills.

9. Pain Relievers and Medications

Why Pack It: Having basic medications on hand, such as pain relievers, can help manage headaches or other minor ailments that might arise during your flight.

10. Earplugs and Eye Mask

Why Pack It: These items help create a more comfortable environment for sleeping on the plane by blocking out noise and light.

11. Mini Hairbrush or Comb

Why Pack It: Keeping your hair tidy can help you feel more put-together after a long flight. A compact hairbrush or comb is a useful addition.

12. Travel-Sized Perfume or Body Spray

Why Pack It: A small bottle of your favorite scent can help you feel fresh and confident after a long journey.

Additional Tips for Packing Your Airplane Toiletry Bag

1. Use Travel-Sized Containers

To comply with airline regulations and save space, transfer your favorite products into travel-sized containers. Look for refillable bottles that are leak-proof and durable.

2. Organize with Clear Bags

Using clear, resealable bags not only helps with security checks but also keeps your toiletries organized and easily accessible.

3. Label Everything

Labeling your containers can prevent confusion and ensure you know exactly what each item is, especially important for medications and skincare products.

4. Prioritize Essentials

Pack only what you really need. Prioritize items that contribute to your comfort and well-being during the flight.

5. Keep Liquids Accessible

Place your quart-sized bag of liquids at the top of your carry-on for easy access during security checks.

How to Maximize Comfort During Your Flight

In addition to packing a well-stocked toiletry bag, here are some tips to maximize your comfort during your flight:

1. Stay Hydrated

Drink plenty of water to stay hydrated. Avoid alcohol and caffeine, as they can contribute to dehydration.

2. Wear Comfortable Clothing

Dress in layers and choose comfortable, breathable fabrics. Consider bringing a scarf or shawl to use as a blanket.

3. Move Around

If possible, get up and move around the cabin to improve circulation and reduce the risk of deep vein thrombosis (DVT).

4. Practice Good Posture

Adjust your seat and use a travel pillow to maintain good posture and reduce neck and back strain.

5. Manage Your Sleep Schedule

If you’re on a long-haul flight, try to align your sleep schedule with your destination’s time zone to reduce jet lag.

Conclusion

Packing a well-organized airplane toiletry bag can significantly enhance your comfort and well-being during your flight. By including essential items such as a travel-sized toothbrush, facial wipes, moisturizer, and medications, you can ensure you’re prepared for any situation. Additionally, following airline regulations and packing tips will help you navigate security checks smoothly and keep your toiletries accessible.


The 12 Best Netflix Series to Watch in 2024

0

Netflix continues to be a dominant force in the world of streaming entertainment, consistently delivering a diverse array of series that captivate global audiences. As we move through 2024, several Netflix series have emerged as must-watch content. Whether you’re a fan of drama, sci-fi, comedy, or thrillers, this guide highlights the best Netflix series to add to your watchlist this year.

  1. Stranger Things Season 5

Genre: Sci-Fi / Horror

Synopsis: The much-anticipated fifth season of “Stranger Things” promises to deliver more thrilling adventures as the kids of Hawkins face new supernatural threats. As the mystery of the Upside Down continues to unravel, fans can expect high-stakes drama and emotional moments.

Why Watch: “Stranger Things” has been a fan favorite since its debut, and the latest season is set to offer the same mix of nostalgia, horror, and heartwarming friendships.

  1. The Crown Season 6

Genre: Historical Drama

Synopsis: “The Crown” returns with its sixth and final season, chronicling the later years of Queen Elizabeth II’s reign. This season delves into the 1990s and early 2000s, covering pivotal events and personal challenges faced by the royal family.

Why Watch: Known for its impeccable production and compelling storytelling, “The Crown” offers a deep dive into British history and royal intrigue.

  1. The Witcher Season 3

Genre: Fantasy / Action

Synopsis: Geralt of Rivia is back for another action-packed season of “The Witcher.” Season 3 continues to explore the intertwined destinies of Geralt, Yennefer, and Ciri, as they navigate a world filled with monsters, magic, and political intrigue.

Why Watch: With its rich world-building, complex characters, and epic battles, “The Witcher” remains a standout in the fantasy genre.


  1. Bridgerton Season 3

Genre: Romance / Drama

Synopsis: The third season of “Bridgerton” focuses on the romantic escapades and societal dramas of the Bridgerton family. Expect more lavish balls, scandalous secrets, and heartwarming love stories set in Regency-era London.

Why Watch: “Bridgerton” combines romance, drama, and historical charm, making it a delightful escape into a beautifully crafted world.

  1. Ozark: The Final Chapter

Genre: Crime / Thriller

Synopsis: “Ozark” returns for its concluding chapter, bringing the story of the Byrde family to a gripping end. As they navigate the dangerous world of money laundering and drug cartels, tensions rise and alliances are tested.

Why Watch: Known for its intense plot and stellar performances, “Ozark” keeps viewers on the edge of their seats with every episode.

  1. The Umbrella Academy Season 4

Genre: Superhero / Drama

Synopsis: The quirky superhero family of “The Umbrella Academy” returns for its fourth season. As they face new threats and unravel more family secrets, their unique abilities and complicated relationships are put to the test.

Why Watch: With its blend of humor, action, and heartfelt moments, “The Umbrella Academy” continues to be a fan-favorite in the superhero genre.

  1. Lucifer: The Final Season

Genre: Urban Fantasy / Drama

Synopsis: “Lucifer” concludes with its final season, following the Devil-turned-nightclub owner as he navigates his complex relationship with humanity and his divine responsibilities.

Why Watch: With its charismatic lead and blend of crime-solving and supernatural elements, “Lucifer” offers a unique and entertaining experience.

  1. Money Heist: Korea – Joint Economic Area Season 2

Genre: Heist / Thriller

Synopsis: The Korean adaptation of the popular Spanish series “Money Heist” returns with more high-stakes heists and thrilling plot twists. This season continues the story of the mastermind and his team as they execute daring robberies.

Why Watch: Combining the excitement of the original with unique cultural elements, “Money Heist: Korea” offers a fresh take on the heist genre.

  1. Shadow and Bone Season 2

Genre: Fantasy / Adventure

Synopsis: Based on the Grishaverse novels, “Shadow and Bone” returns for a second season, exploring the magical world of Ravka and its diverse cast of characters as they confront new threats and uncover deeper mysteries.

Why Watch: With its rich mythology and visually stunning world, “Shadow and Bone” captivates fantasy fans with its epic storytelling.

  1. Cobra Kai Season 6

Genre: Action / Comedy

Synopsis: The saga of “Cobra Kai” continues with its sixth season, bringing more karate action and nostalgic callbacks to the “Karate Kid” films. Rivalries intensify, and new challenges arise as the characters strive to balance personal growth with martial arts competition.

Why Watch: “Cobra Kai” successfully blends humor, drama, and action, making it a hit among both new viewers and fans of the original movies.

  1. The Sandman Season 2

Genre: Fantasy / Drama

Synopsis: Based on Neil Gaiman’s acclaimed graphic novels, “The Sandman” returns for a second season. The series continues to explore the realm of Dream and its ruler, Morpheus, as he interacts with gods, demons, and mortals.

Why Watch: “The Sandman” offers a visually stunning and narratively rich experience, appealing to fans of fantasy and dark fairy tales.

  1. The Midnight Club Season 2

Genre: Horror / Mystery

Synopsis: Created by Mike Flanagan, “The Midnight Club” returns with more eerie tales and spine-chilling mysteries. Set in a hospice for terminally ill teens who gather at midnight to share scary stories, the series delves into the supernatural and the human condition.

Why Watch: Known for its atmospheric storytelling and deep emotional impact, “The Midnight Club” is a must-watch for horror enthusiasts.

Conclusion

Netflix continues to be a powerhouse in delivering high-quality, diverse content that caters to a wide range of tastes. From heart-pounding thrillers and epic fantasies to heartwarming dramas and spine-chilling horrors, the streaming giant’s lineup in 2024 is more exciting than ever.